Don’t know how to make a one page website in WordPress? It seems like you’ve landed in the right place.
As the name implies, a one page website has all the contents contained on a single page. Especially with WordPress, it’s easier and more fun. In this article, we’ve mentioned simple steps on how to make a single page WordPress website. Hence, without further ado, let’s dive in.
What is a One Page Website and Why Create One?
Any WordPress website has different pages such as a Homepage, Contact page, About us, Services, etc. On the other hand, a single page website has all the information and content on the same page. It has different dedicated sections for each menu.
If you’ve got a large company and want to accommodate more information then, a one-page website may not be the right choice. But, a one page site is perfect for a small business, a portfolio, a landing page for products, etc.
Here are some of the benefits of creating a one page website.
- Simplicity: The first and foremost benefit of a single page website is the simplicity of the site. It’s easier to scan all the contents and navigate the site as well.
- Speed Optimized: A simple site means fewer elements. A site with fewer elements loads faster on the web.
- Easy Maintenance: You can easily maintain a single page because there are only a few contents to keep up with compared to a multiple-page site.
- Lower Bounce Rate: Comparatively, the bounce rate on a single page is lesser than on multiple sites. This helps to increase overall traffic and conversions of your site.
- Cost-Effective: Since it’s easier to create and maintain, single-page sites are cost-effective.
These are just a few benefits of a one page WordPress website. Now that we know its importance let’s make a one-page website in WordPress.
Step-by-Step Guide to Create Single Page Website in WordPress
Step 1: Register a Domain Name & Buy a Hosting Plan
First of all, you need a domain name for your website. A domain name is nothing but a unique name for your website. For example, the domain name of our site is Zakra.com.
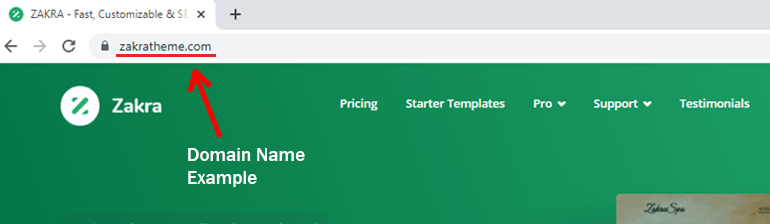
Anybody can search your site on the web with the help of this domain name. However, first of all, you need to register the domain name. There are plenty of domain name registrars in the market these days.
Nevertheless, not all domain name registrars are trustworthy. So, let’s make your job a little easier by suggesting to you the best domain name registrars. It’s none other than – Bluehost.
Bluehost has been serving the audience since 2003. It powers 2M+ websites and supports them daily. Other than that, it’s one of the cheapest domain name registrars out there.
Register a Domain Name
To register the domain name through Bluehost, firstly, visit the site. Then, from the top menu bar, click on the Domain option.
On the search bar, type your desired domain name for your website. There’s a possibility that the domain name has already been taken. However, Bluehost suggests some available domains you can choose from.
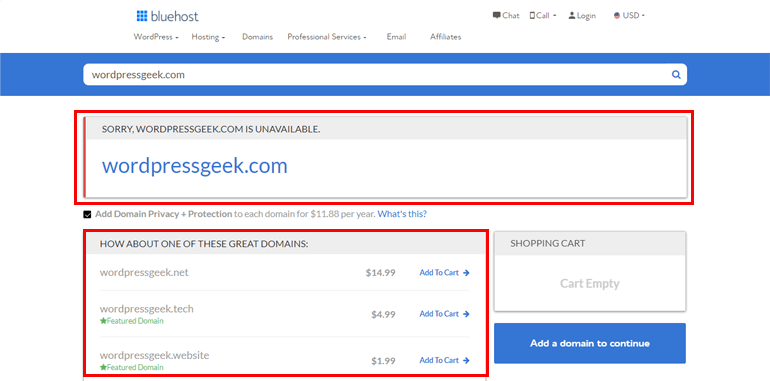
In that case, you need to come up with another unique name for your site. Next, the domain name + privacy protection is added to the Shopping Cart with the total amount. To continue, click on the Proceed button.
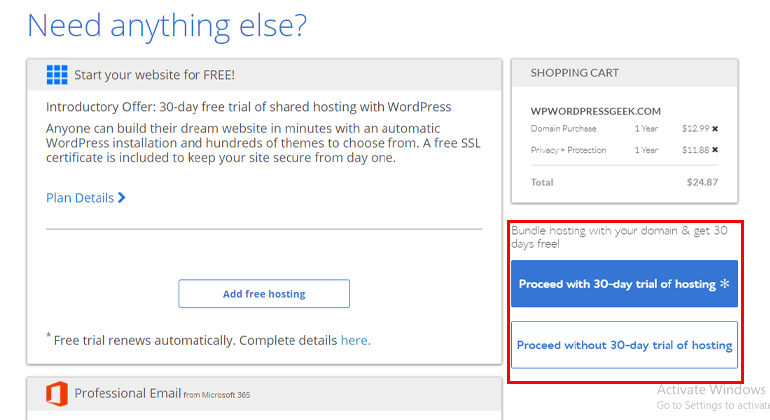
Further, Bluehost offers you a 30-day free hosting trial. However, if you don’t want the offer, click on the Proceed without a 30-day trial of hosting button.
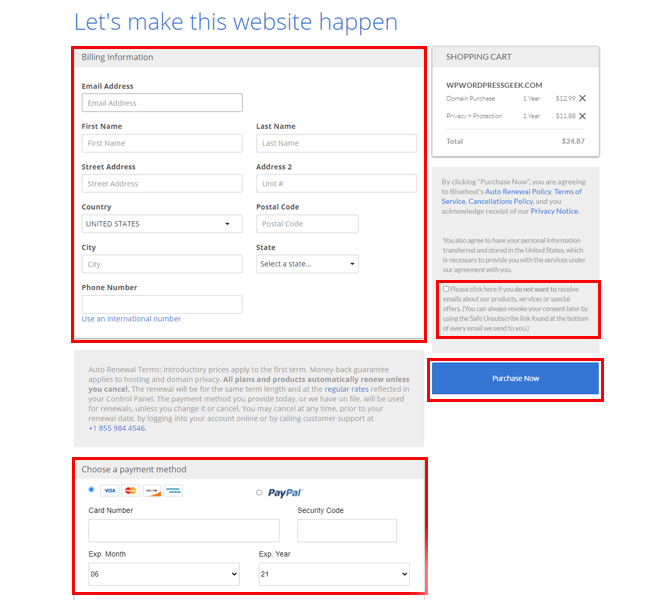
On the next page, fill up the necessary Billing Information and Payment Method. Also, you can choose not to receive the email about the products, services, and special offers by clicking on the checkbox. Then, hit the Purchase Now button.
Purchase a Hosting Plan
It’s time to purchase a hosting plan for your website. Buying a web host is like renting a web space to place your website.
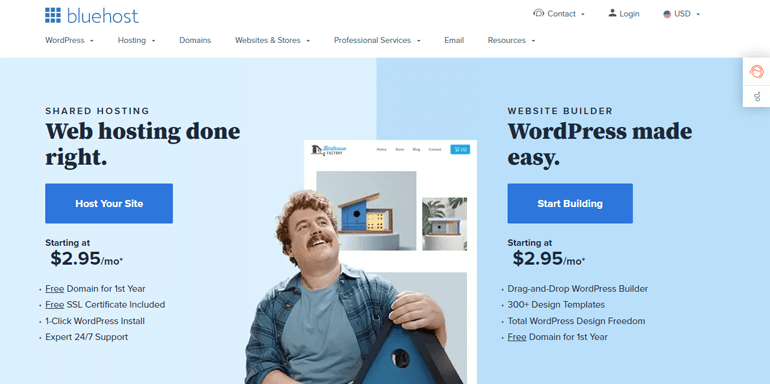
There are many web host providers where you can buy a hosting plan. Lucky for you, along with the domain name registrar, Bluehost is also one of the best web host providers. To purchase a web host, click on the Host Your Site you see on the homepage.
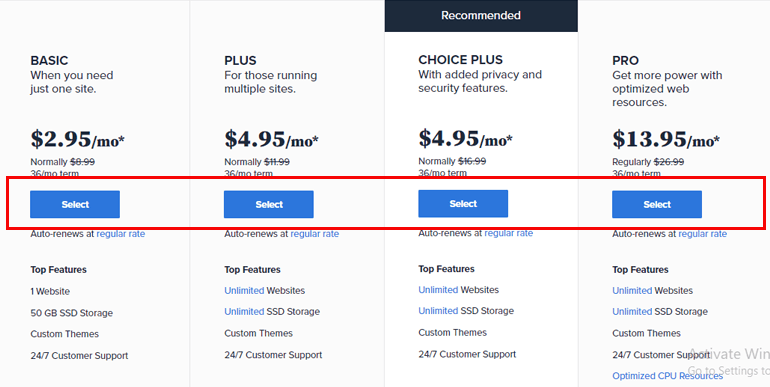
Now, it takes you to the plan and pricing page. Among the four different plans, choose the one that seems appropriate for you. Then, click on the Select button.
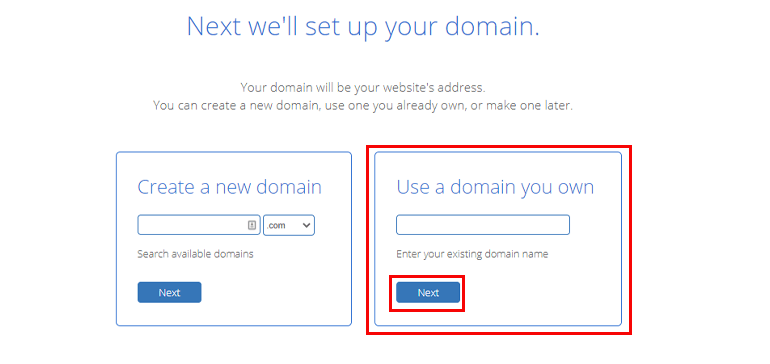
After the selection of the pricing plan, it’s time to set up the domain name. You can either choose to buy a new domain name or use the domain name you already have. We’ve already purchased a domain name earlier; hence, we can use that one. Now, click on the Next button.
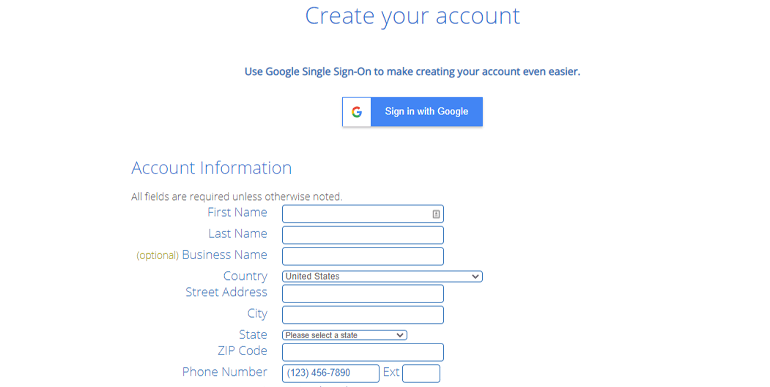
It’s time to create your hosting account. On the Create Your Account page, fill up the necessary information such as Account Information, Payment Information, Package Information, and Package Extras. If you want an Auto-Renewal Plan, check on the box and then hit the Submit button.
And that’s it; you’ve brought yourself a domain name and a web host within a few minutes.
Step 2: Install and Setup WordPress
The second step in how to make a one-page website in WordPress is to install and set up WordPress. Nowadays, many host providers offer WordPress Auto-Install options, including Bluehost.
This means, that while setting up your web host, WordPress will be automatically installed. The only thing you need to do is log in to your WordPress dashboard. However, sometimes WordPress might not be auto-installed. In that case, Bluehost provides a One-Click Install feature.
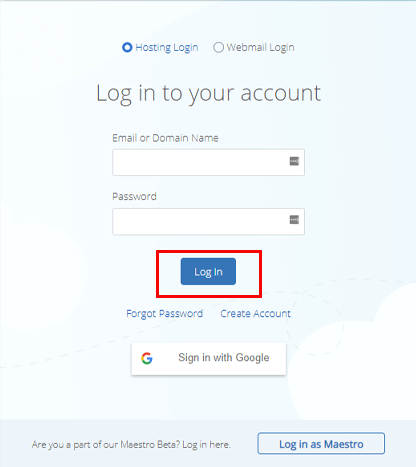
To install WordPress, log in to your hosting account (we created it in the above step). You can find the Login option at the top right of the homepage of Bluehost.
Now, on the login form, enter your Email or Domain Name and Password. Then, click the Login button.
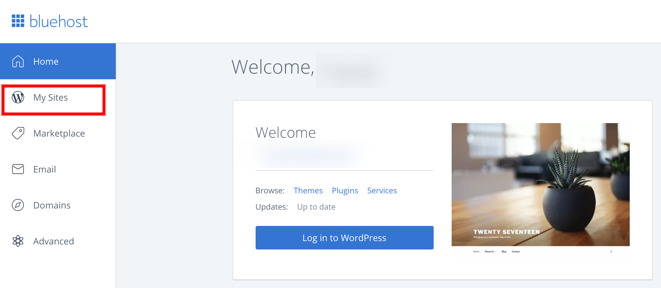
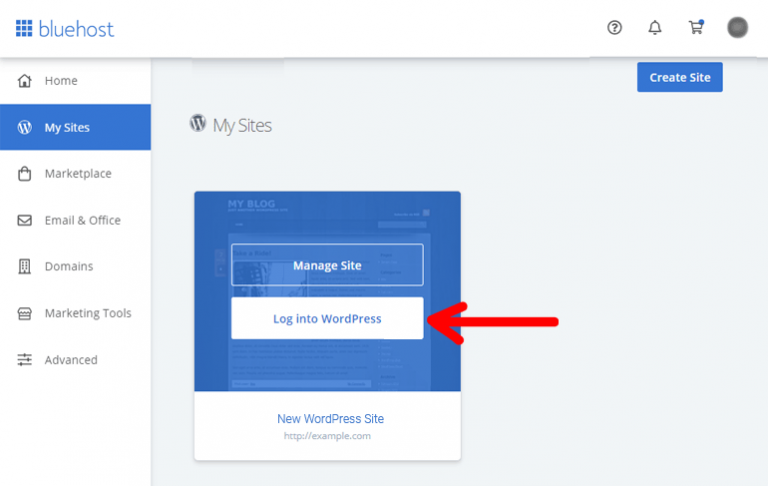
Once you’re logged into the Bluehost dashboard, select the My Site option from the left sidebar.
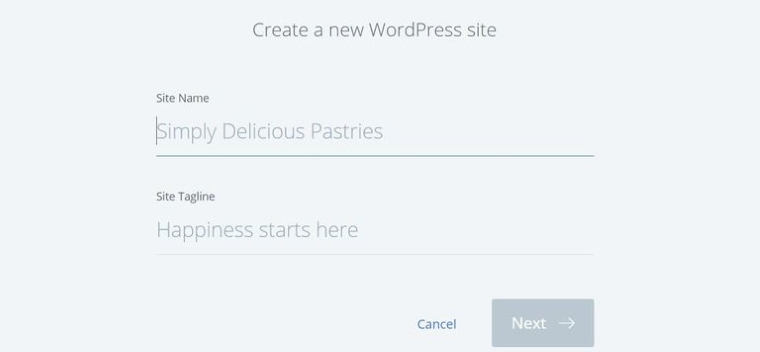
Then, click on the Create Site option, enter your Site Name and Tagline, and select the Next button.
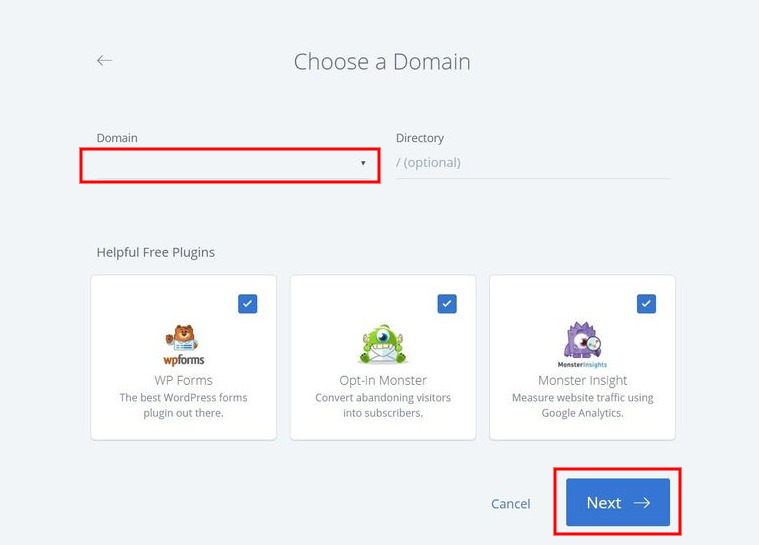
Thereafter, enter your Domain name and click on the Next button.
WordPress is now automatically installed. Simpler than you thought, isn’t it? Now, all that’s left to do is log in to your WordPress dashboard. To do that, click on the Login to WordPress button.
Step 3: Choose a One Page WordPress Theme
After the WordPress installation, it’s time to install a one-page WordPress theme and change the front-end of your website. All the content of your site will be displayed according to the theme you choose. Hence, choose wisely. If you’re confused, here are some tips.
- Well-coded and documented: Well-coded themes make your site more secure and speed optimized. Additionally, documentation can help you figure out themes better by yourself. Hence, select a well-coded and documented theme.
- Last updated date, ratings, and reviews: Did you know WordPress keeps updating itself to avoid malware threats? So, the themes you install need to be compatible with the latest version of WordPress. Further, you can also check the ratings and reviews of the previous user.
- Compatibility with plugins: Plugins add more functionality to your sites therefore, the theme you choose needs to fully support other plugins.
- Fully supports page builders: A page-builder is helpful to customize your page as per your need. Some popular page builders are Elementor, Brizy Builder, and more.
Having said that, it’s time to choose the best one-page WordPress theme for your website. Zakra is the theme you’re looking for. It has all the features a one-page WordPress theme should have.

It’s highly responsive; hence, your site will look great on every device such as mobile, laptop, tablet, etc. Other than that, it’s highly customizable, SEO friendly, speed optimized, AMP ready, translation ready, and more.
Install the Theme
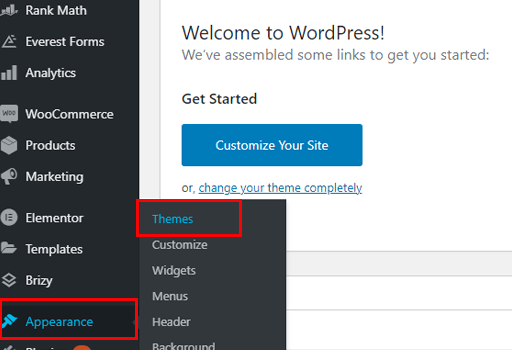
Now that we’ve decided on the theme, it’s time to install it. To do that, log in to your WordPress dashboard. From the sidebar menu, navigate to Appearance >> Themes.
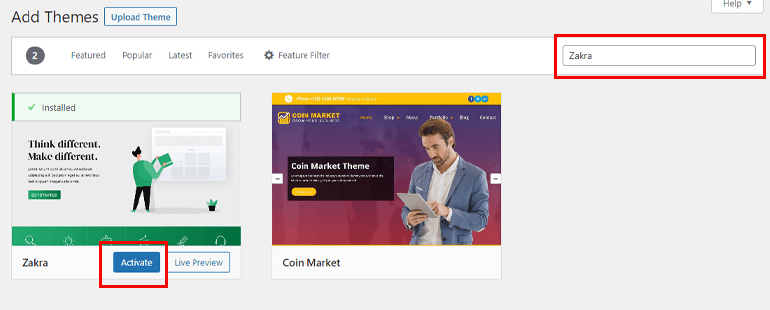
Next, click on the Add New button located at the top left.
On the search bar, type Zakra. Once the theme appears, click on the Install button. It might take a few seconds to install. Once installed, finish off by activating the theme.
The above method is to install the free version of the theme. If you want extra features then, you need to purchase the premium version of the theme. The installation process of the premium version differs from the free version.
Before you install the theme, you need to buy the theme. Visit the Zakra theme site and buy the theme. Then, the theme is downloaded on your computer as a zip file.
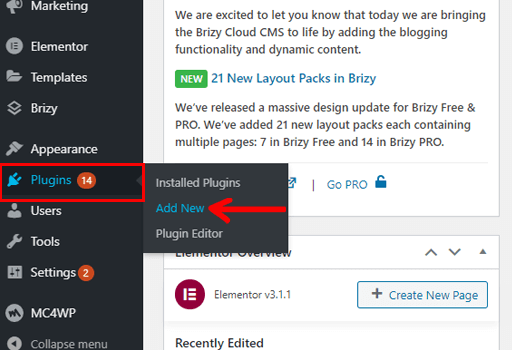
Now, to install the premium version, navigate to Plugins >> Add New. Click on the Upload button.
Next, click on the Choose File and select the zipped file you’ve downloaded before. Then, click on the Install Now button and finally hit the Activate button.
After the activation process, you need to enter the License Key that you got while purchasing the premium theme.
Import Theme Demo
With demos, you don’t need to create a website from scratch. All you need to do is import the demo, customize it as per your need, and you’re good to go.
In order to import Zakra demos, click on the Get Started with Zakra button that appears at the top once the theme is installed.
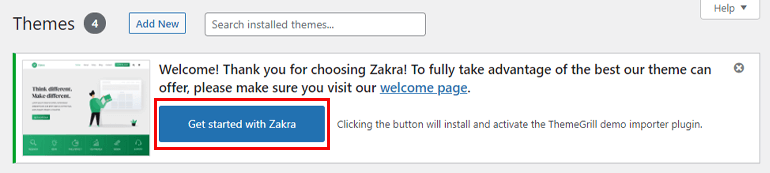
Clicking on this option will automatically install the ThemeGrill Demo Importer plugin. Now, it takes you to the demo page. You can see more than 65 demos there. However, since we’re going to make a one-page website, let’s import the Zakra one-page demo.
Click on the Import Button. A confirmation popup appears; you need to click on the Confirm button. Once the demo is imported, click on the Activate button.

Step 4: Add New Section and Menu
If you see the live preview of your website, it looks exactly like the demo. However, you might want to add some more content according to your site.
If you look at the header, there are 5 different menus already present. You can add or remove these menus. For this tutorial, we’re going to add a new menu in the header.
So let’s get started.
Right now, there are menus – About, Services, Portfolio, Testimonials, and Contact Us. Let’s add a Gallery menu that’ll showcase all your previous project’s images.

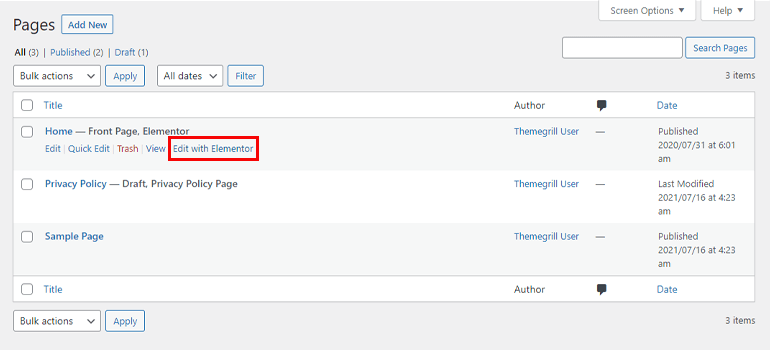
Firstly, decide a place where you want to place your gallery block. For example, add it after the About Us section. Then, select the Pages option from the sidebar of your dashboard.
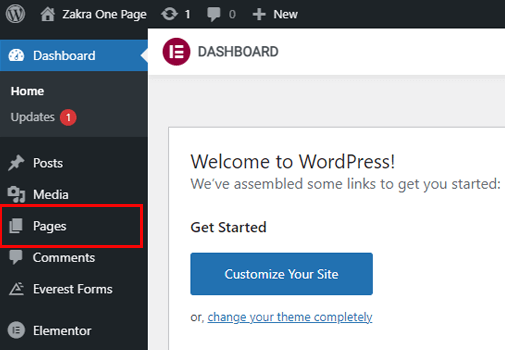
Next, you can see the different pages there. Among them, the page Home is the front page of your site. If you hover over, you can see the different edit options. Click on the Edit with Elementor option. It’s much easier to edit with the help of a page builder like Elementor than the traditional WordPress editor.
It takes you to the page editor. On the right side, you can see the front page and on the left side, there are widgets and elements. You can simply drag and drop the elements of your choice from the left side to the page on the right.
Scroll down to the Contact Us block. Now, hover over the block, and you’ll see the Plus (+) icon. This helps you to the Add Section above the block on your page.

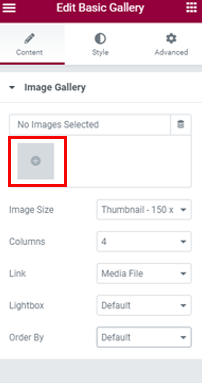
After that, drag the element Basic Gallery from the left side and drop it on the block we just created.
Next, click on the + icon to add images from the editor on the left side. Additionally, you can also decide the number of columns, Image size, Link, Lightbox, and more.
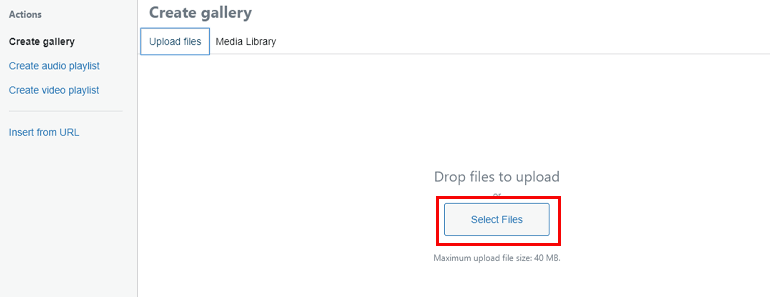
When you click on the + icon, a pop-up appears; click on the Select Files and upload images from your computer.
Now, select the Create a new gallery button at the right bottom.
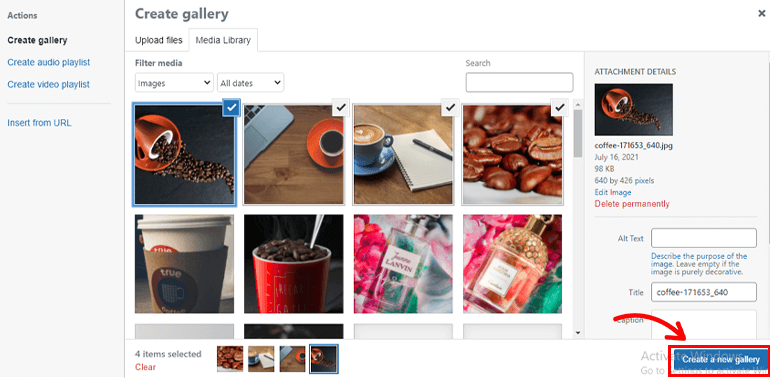
You can also Reverse order of the images. Once done, select the Insert gallery.
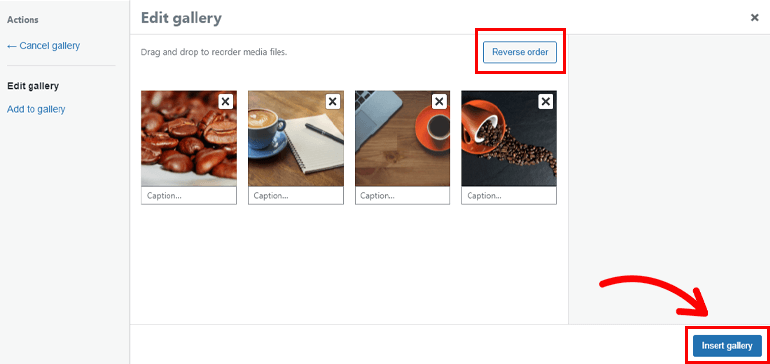
After the images are uploaded, click on the Update button to save all your changes.
If you see the live preview of your site, you can observe that a new section has been added.
Add New Menu
Now, let’s add a new menu at the top bar, namely Gallery, so that users can easily navigate to the Gallery section below.
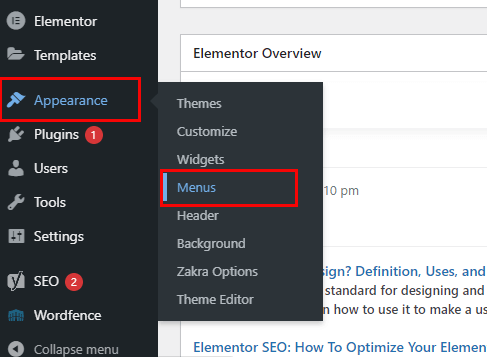
To do that, navigate to Appearance >> Menu from your WordPress dashboard.
A primary menu is already present there. We need to remove that menu and add a new menu with the Gallery option on it.
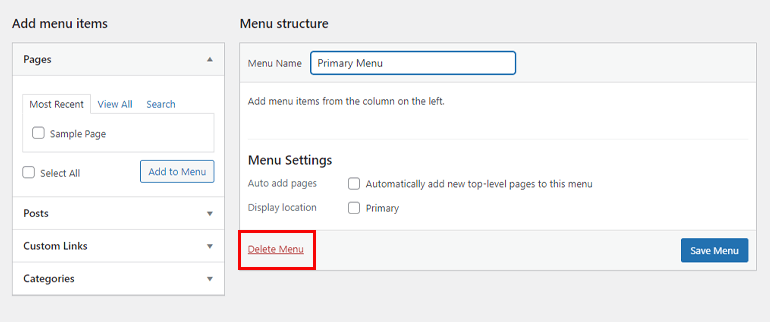
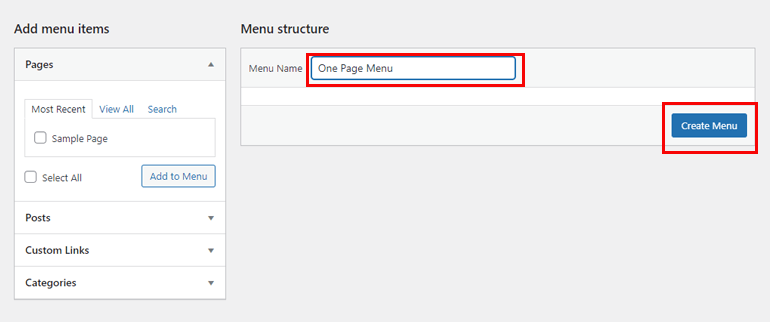
Select the create a new menu option at the top and write a Menu Name and then click on the Create Menu button.
Step 5: Add Menu Navigation
In the above step, we add a new menu on the page. Now it’s time to link the different menus to their specific section. For that, navigate to Pages and select the Edit with Elementor option on your Home page.
We already know there are different dedicated blocks for each section. Click on the block of the About Us section. On the left side, there are various editing options. Select the Advanced option. You can see there’s a CSS ID option, type an ID there. To make it simple, let’s give it a CSS ID – #about.
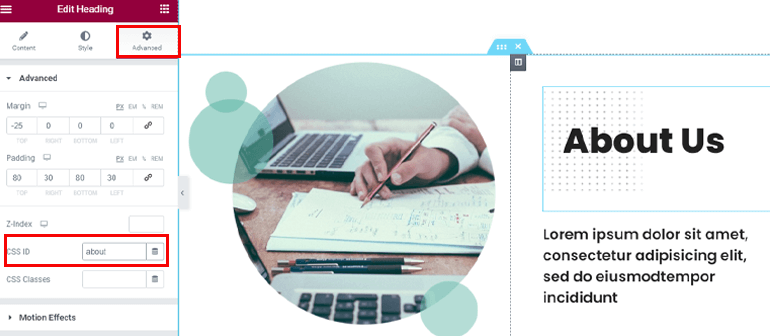
Likewise, repeat the process and give each section an appropriate CSS ID. For example, we gave these CSS IDs for each section.
- Gallery: #gallery
- Services: #services
- Portfolio: #portfolio
- Testimonials: #testimonial
- Contact Us: #contact
Once done, click on the Update button at the bottom left.
Note: You don’t need to add # while giving a CSS ID to each section. It’ll automatically be added.
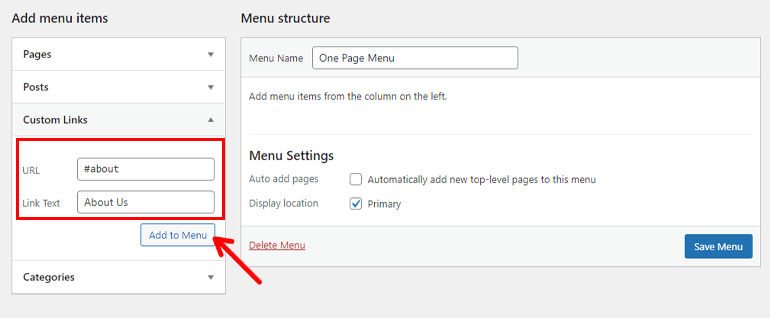
After that, go back to your WordPress dashboard and navigate to Appearance >> Menus. Now, select the Custom Links from the Add menu items option.

Below the Custom Link, there are two different fields – URL and Link Text. On the Link Text write the name of the menus that you want to appear at the top. And on the URL write the CSS ID of the respective section.
For example, first is the About Us section. So on the Link Text add About Us and on the URL add its CSS ID – #about. Then, click on the Add to Menu button.
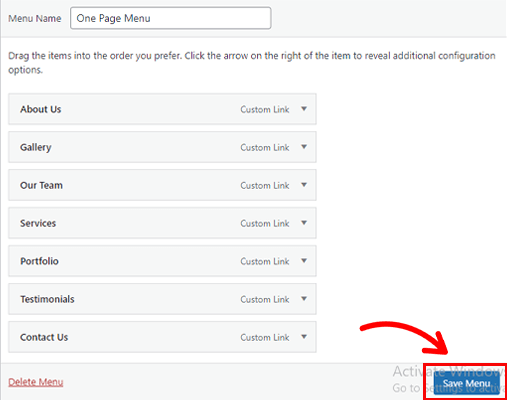
Correspondingly, repeat the process for every section. After you’ve added all the sections, click on the Save Menu button at the bottom right.
And, that’s all. You’ve successfully added the new menu to your website. You can see the live preview of your site and check if the navigation is working or not. Just click on one of the menus and see if it navigates to that dedicated section.

You can add new sections and menus by following the same process.
Step 6: Configure Important WordPress Settings
There are few basic settings you need to configure while creating a WordPress website. We’ve mentioned them below.
i) Add Title and Tagline
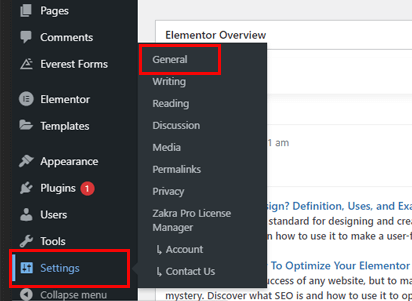
The Title is the name of your website, and Tagline is simply a short description of what your site is about. To add a title and tagline, navigate to Settings >> General.
Now add the site title of your choice and also a short appropriate description for your website. Once you’re happy with the title and tagline, click on the Save Changes button at the bottom.

ii) Configure Permalink Settings
Permalinks are the URLs of posts, pages, or any other content on your website. By default, WordPress uses a URL that’s not clean-looking. It’s basically in query string format.
However, you can change that and add a simpler permalink. For that, navigate to Settings >> Permalinks. There are many options, as you can see such as Day and name, Month and name, Numeric, Post name, and Custom structure.
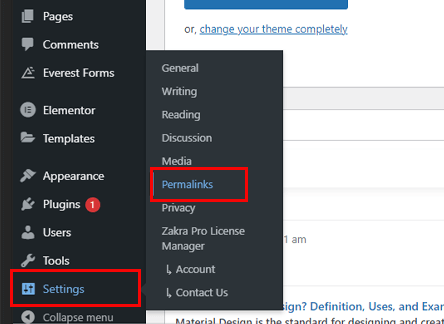
To be honest, any option other than the default one is SEO-friendly. Hence, go ahead and choose any one of the options (except the default one). Then, lastly, click on the Save Changes button.
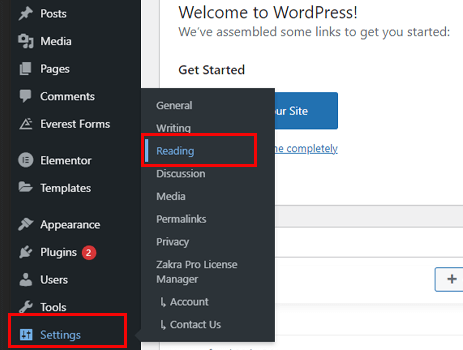
iii) Search Engine Visibility
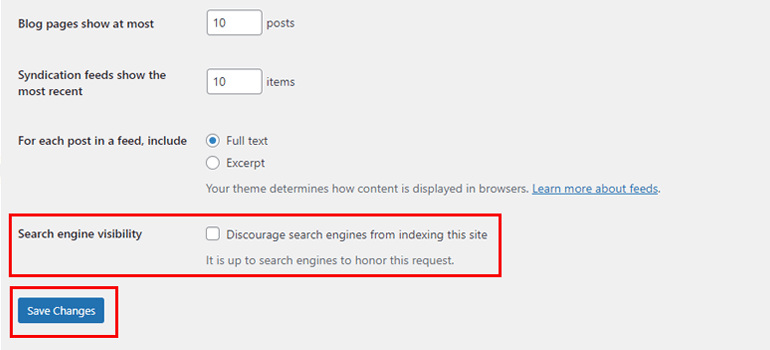
You need to disable this option so that your site is visible to the users. If this option is enabled, it discourages search engines from indexing your site. To make your site visible, navigate to Settings >> Readings.
Now, check if the Search Engine Visibility is enabled or disabled. In case it’s marked, unmark it and finally select the Save Changes button.
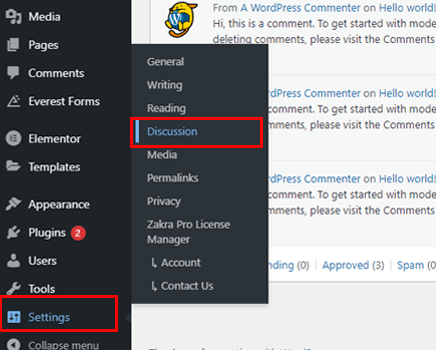
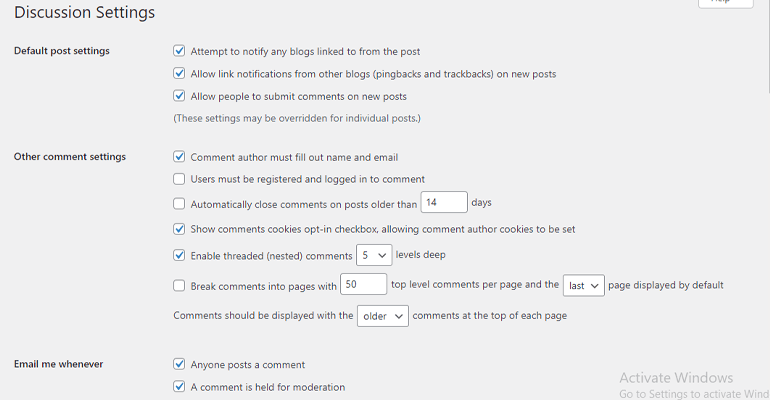
iv) Enable Comments
You might want to add a blog section to your one-page website. In that case, you can enable the comments by the readers on your posts. To do that, select the Settings option and click on the Discussion.
You can configure all the necessary settings regarding comments. Settings such as notification when someone comments, close comments on older posts, manually approve comments, and much more. Make sure, your comment section is secure while configuring the settings. After done, select the Save Changes button.
Step 7: Install Essential Plugins
The next step on how to make a one-page website in WordPress is to install the necessary plugins. Plugins can add additional features to your site. Below we’ve listed some must-have WordPress plugins.
i) User Registration
User Registration is a popular WordPress registration form plugin developed by WPEverest. It has a drag and drop builder so that you can just drag and drop the elements and create forms of any type.
Additionally, it has unlimited form fields, email notifications, an inbuilt login form, and more. Also, it offers a user profile account. This means all your registered users can log in to their personal accounts. Furthermore, you can also customize the user profile account with the help of premium addons.
ii) WP Rocket
WP Rocket plugin helps to optimize the speed of your site. We all know how annoying a slow site can be. This plugin will make your site load faster on any device – mobile, tablet, desktop, etc.

Optimizing your site’s speed also helps you rank higher in the search engine and generate more conversions. To add more, WP Rocket offers image optimization, lazy loading, database optimization, and much more.
iii) Everest Forms
Everest Forms is a plugin to create any type of form by using a drag and drop interface. Above all, it offers features like pre-designed form templates, unlimited form fields, form designers, and more.
Not to mention, it has loads of addons you can integrate like Style Customizer, Survey Polls & Quiz, etc.
iv) MonsterInsights
Monster Insights keeps all the tracks of your website’s performance. It’s one of the best WordPress Google Analytics plugins out there. It keeps track of all your conversion rates, bounce rates, etc.

Furthermore, it helps you to know your audience more by providing you insights about their likes, dislikes, locations, age, gender, etc. Hence, you can deliver exactly what your users prefer.
Step 8: Publish Your Site & Start Marketing
When you’ve just created a website, users are still not aware of your website. To make the audience aware of your site, you need to promote it. There are a few ways you can promote it. They’re listed below.
Social Media Marketing: Promote your site on all major social media platforms such as Facebook, Twitter, Instagram, and more. Furthermore, add social share buttons on your website that allows your user to share your content on their social profiles.
Installing plugins like Easy Social Share can help you add social share buttons without any hassle.

Email Marketing: Email marketing is one of the easiest ways to promote your website. You can send emails to your subscribers and ask them for help. Hopefully, they’ll promote your site and make it more popular.
SEO Optimized Content: Identify your target audience and make content that meets their expectations. Making your content Search Engine Optimized is a good start to attract traffic and customers. Plugins like Yoast SEO can help you improve the SEO of your content.
Add Backlinks: Along with good content, backlinks are also very important. Backlinks are the web links of a website used on-page of another site. Pages with high backlinks seem to have high organic search engine ranks. Hence, insert appropriate backlinks on your site.
Wrapping It Up!
And that’s it. This is all we’ve to say on how to make a one page website in WordPress. Here’s a quick review of all the steps:
- Step 1: Register a Domain name and Purchase a Web Host on Bluehost
- Step 2: Install and Setup WordPress
- Step 3: Choose a One-Page WordPress Theme
- Step 4: Add a New Section and Menu
- Step 5: Set up and Link the Menus to the Sections
- Step 6: Configure Important WordPress Settings
- Step 7: Install Essential Plugins
- Step 8: Publish Your Site & Start Marketing
Hope this tutorial was helpful for you and that you created a beautiful one-page website. Also, share this on social media. Other than the above steps, keep updating your site, themes, & plugins. Further, you can also edit the header and footer.
Finally, we’ve come to the end of this article. Follow us on Twitter and Facebook for more informative articles in the future.