Do you want to know how to set up AMP in WordPress? If yes, then stay tuned!
Stats say more than 50% of internet users use mobile devices for internet browsing. Thus, it’s high to improve the loading speed of your site on such devices. And if you’re thinking about it, then there’s no better choice than Accelerated Mobile Pages or AMP.
In this article, we’ll be talking in detail about how to create AMP pages in WordPress. But before that, let’s understand more about AMP and its functions.
What is AMP and How Does it Work?
Accelerated Mobile Pages or AMP is an open-source project created by Google. The major goal of this start-up is to optimize mobile web browsing. It was also meant to improve user experience by making web content load faster on such devices.

Upon implementing AMP in your WordPress site, it becomes responsive. It means your site will be totally compatible with all types of screens. This way, there won’t be any disturbances to visitors while browsing your site.
Therefore, AMP pages drive significant traffic to your site along with reducing the bounce rate. Undoubtedly, this would make your site rank higher in search engines and maintain your SEO.
Technically, AMP works with the help of an HTML framework. This lets the site owners create ‘lightweight’ web pages. And their optimization is powered by JavaScript.
Likewise, the content of your website is hosted on Google AMP cache. Search engines like Google use the same cached version. They use it to show instant results whenever the users go through your site’s link in the search results.
Pros and Cons of Google AMP
Now, after a short introduction of Google AMP, let’s go through its pros & cons. Some major benefits of enabling AMP on your sites are:
- Enhance Loading Time of your Website: Google AMP helps to load your website faster so that the visitors could browse without any disturbance.
- Reduced Bounce Rates: When your website performs betters, the rate of website engagement increases. Hence, there’s a significant decrease in bounce rates.
- Better Search Results: Mobile-friendly websites built with AMP are more likely to have a better ranking than non-AMP pages.
- Improves Server Responses: The AMP framework reduces the load from your servers, eventually making its responses quicker.
- Increased ROI (Return on Investment): With a stable & fast-loading website, it will drive more page visits, increase conversions, and generate leads.
- Increase in Ads viewing: Results show that AMP pages deliver better advertising as they are loaded faster and visitors get a quick glimpse.
However, there are certain things that you need to consider before setting up AMP in WordPress. They are:
- Slow-Loading Video Content: AMP may not be able to render the videos as quickly as other content.
- Limited Support & Features: There aren’t many widgets and features that you can add to your mobile AMP page.
- Can be Difficult for Non-developers: It can be difficult to learn how to implement AMP in WordPress. But with the correct WordPress AMP plugins, things get easy.
How to Set Up AMP in WordPress? (Step by Step for Beginners)
Now, after you know well about AMP and its importance, let’s move to how to set up AMP in WordPress. We will be discussing the whole process in detail via using WordPress AMP plugins, So, let’s begin!
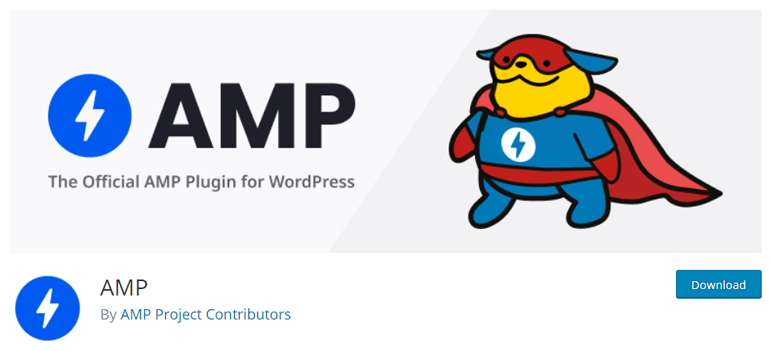
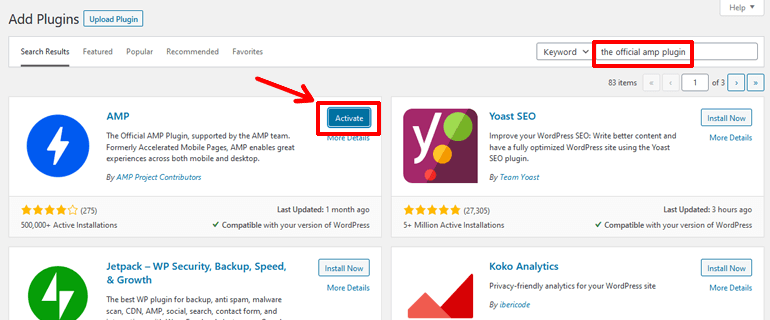
Step 1: Install and Activate the AMP Plugin (The Official AMP Plugin for WordPress)
We start with installing and activating ‘The Official AMP plugin for WordPress’. This plugin enables AMP content publishing with WordPress. Also, it seamlessly integrates with the standard mechanism of the platform.
For that, navigate through Plugins >> Add New on your WordPress sidebar.
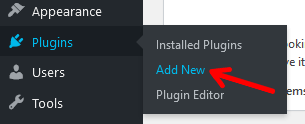
Search for the plugin, click on the ‘Install Now’ button, and activate it simultaneously.
Right after you install it, its icon will appear on the sidebar. You can check there for its updates, settings, and analytics. We will discuss this in step 2.
On the same page, if you want to know in detail about installing a plugin, go through ‘How to Install a WordPress Plugin?’. You will certainly get more ideas on it!
Step 2: Adjust the Settings
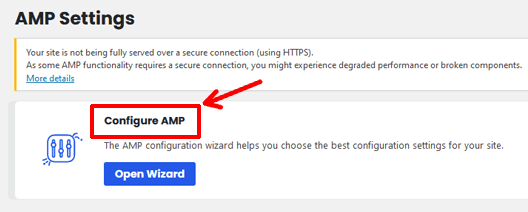
After you’ve installed the AMP plugin, it’s necessary to adjust its settings so that it could work properly. For that, go to the ‘AMP’ section available on your WordPress sidebar. You can see two options: Settings and Analytics there.
Similarly, at the top of your page, you can see the ‘Configure AMP’ section. It helps to choose the best configuration settings for your site. Hence, you need to set it up before starting.
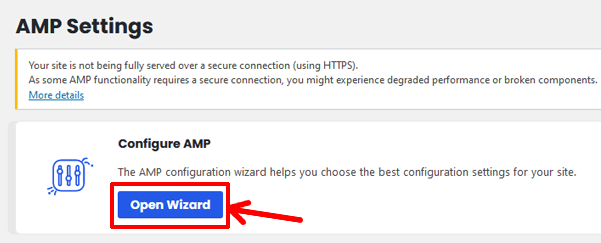
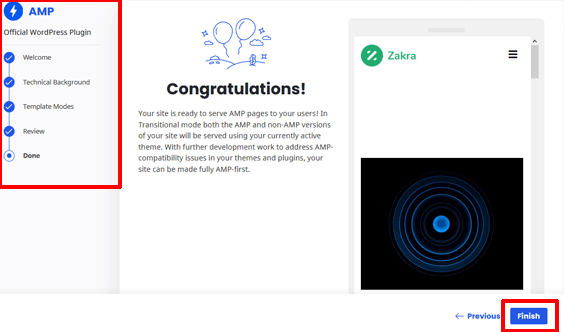
For that, click on ‘Open Wizard’ and you can set the things as per your convenience.
You only have to set your technical background & template mode you want.
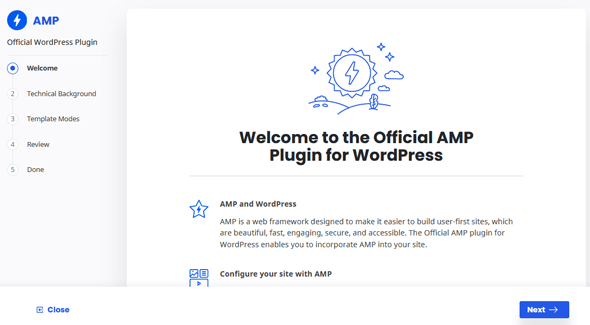
After you’re done, click on the ‘Finish’ options. And it will save your settings & the site is ready to serve AMP pages to your users.
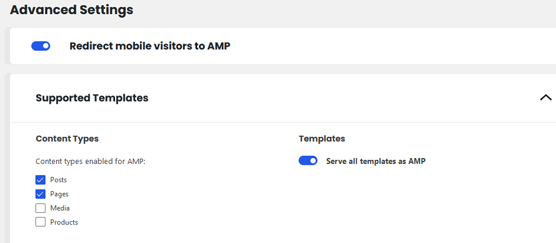
On the same page, you can see the options for ‘Advanced Settings’ too. In the section of ‘Supported Templates’, you can enable AMP for the content type you want.
Likewise, in ‘Plugin Suppression’, you can add/suppress the plugin from running on AMP pages. It shows the active plugins on your site and their status on AMP markup.
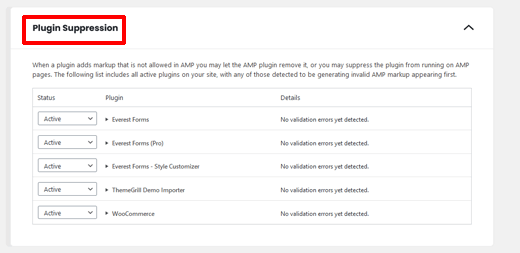
You can simply change the status for any activated plugin by clicking on its dropdown menu. You can click on ‘Active’ to activate or ‘Suppressed’ to inactivate the plugin on AMP pages.
Finally, there is a section on ‘Analytics’ too. But it’s recommendable to go through it only if you’re a tech-savvy person. After you set up the settings, just don’t forget to click on ‘Save Changes‘

Step 3: Add Advanced Functionality to your AMP Content
The basic AMP plugin has some limitations. One of them is the configuration of your AMP content. Also, there is a lot of other customization that you aren’t available in the basic AMP plugin.
So, we add the ‘AMP for WP’ plugin for this. It automatically provides the AMP functionality on your website, making it faster to load. And also, it comes with tons of useful extensions.
To install it, navigate through ‘Plugins’ >> ‘Add New’. Search for AMP for WP, click on ‘Install Now’ and activate it.
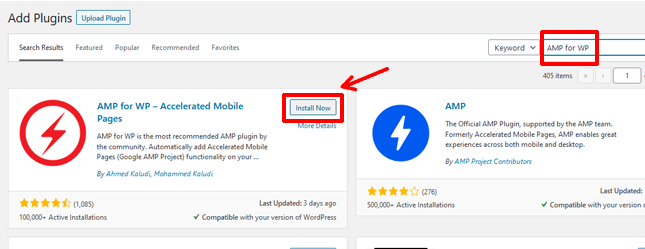
After its installation, its icon will appear on the sidebar. You can see many options under its icons; Setup, Settings, Design, Extensions, Upgrade to Pro, Documentation, and Import/Export.
If you want to learn its functioning in detail, getting through its documentation will be a great idea. But, if you want to avoid that, keep on reading!
Configuring & Customizing Your AMP Site
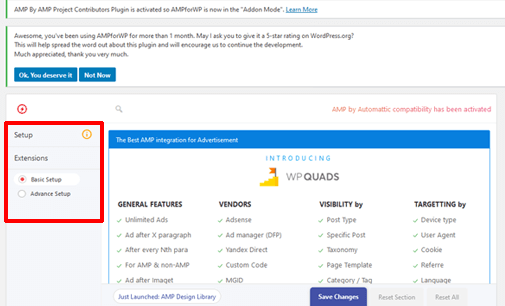
AMP for WP has made it easy to set up and configure its settings. At first, it gives you the option to choose from ‘Basic Setup’ and ‘Advance Setup’. It’s better to choose the basic level, to begin with. But, there are more options of customization in Advanced.

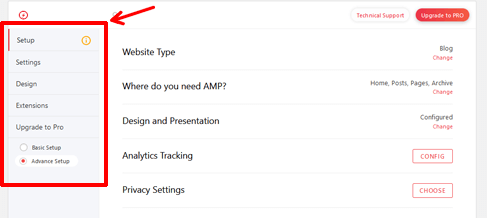
To begin, there is an option of ‘Setup’. You need to complete your setup for a better AMP experience. You can set the website type, design & presentation, analytics tracking, and where you need AMP for.
Likewise, you can configure the design of your AMP pages. For that, you need to choose ‘Advance Setup’. The ‘Design’ section will then appear on the screen. Click on the ‘Design’ and multiple options of customization come up.
From here, you can choose and add different ‘themes’ for your site. Similarly, there are options to customize the layouts and color options of your site. Also, you can set the options for your date format, published date of your posts, and many more.
After you set all them up, just don’t forget to click on the ‘Save Changes’ button.
Enable AMP for Your Pages & Posts
AMP for WP plugins allows you to enable AMP for your pages, posts, archives, and more. For that go to ‘Settings’ >> ‘General’.
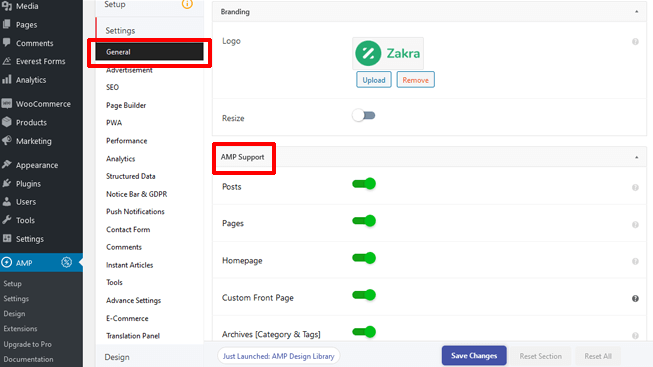
You can find the options for Branding and AMP Support. In the AMP Support section, you can enable AMP support for the content you want. Just scroll the white button, make it green, and it’s activated.
Likewise, on the branding section above, you can find options to upload/remove and resize your Brand Logo.
In the same section, you can also adjust its Custom Post Types and Custom Taxonomies.
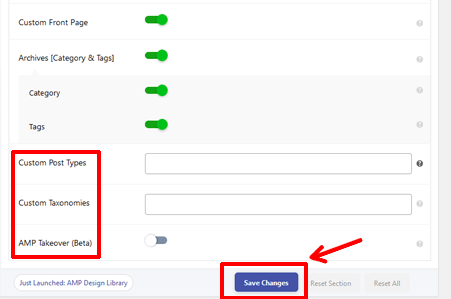
Just like above, don’t forget to click ‘Save Changes’ after you make those customizations.
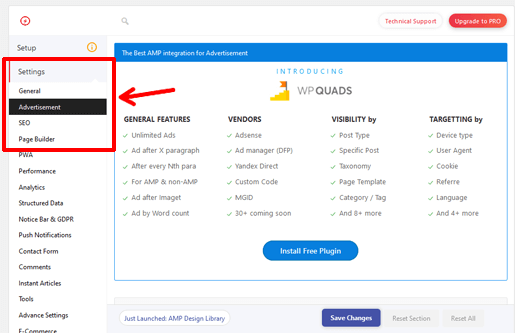
Add AdSense Ads to AMP Content
To add Adsense ads to your AMP content, go to ‘Settings’ >> ‘Advertisement’. There are sections for customizing ‘Advertisement Positions’, Ad Performance, and General Settings.

To configure the ad blocks, all you need to do is pick your ad location. There are six different locations like ‘Below the Header’, ‘Below the Footer’, and others. You can select the one you’d like to add.
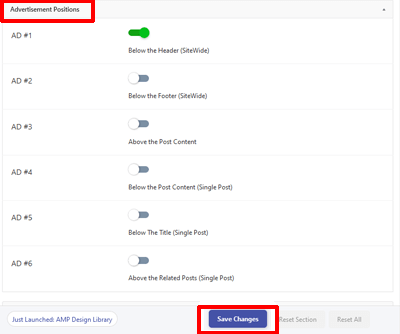


Then, you can configure ad settings like ad type, ad size, and publisher’s data.
Additionally, you can enable ‘Optimize for Viewability’ and ‘Sponsorship Label‘ at Ad Performance and General section respectively.
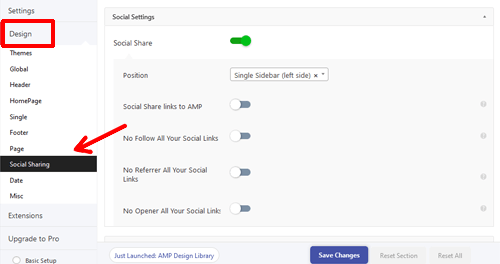
Add Social Buttons to AMP Content
You just need to go to the ‘Design’ >> ‘Social Sharing’ option for adding social buttons. Here, you can find sections like Social Settings and Social Sharing.
You can enable or disable individual social networks in the Social Sharing section. You will find all the latest social media handles like Telegram, Line, Reddit, and more.
Moreover, you can enable social share via Social settings. You will also find extra options for its position, social share links to AMP, etc. after enabling it.
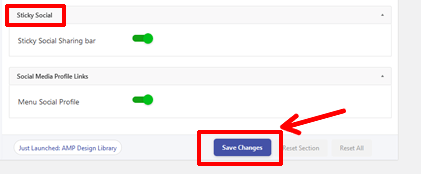
Furthermore, there are options for ‘Sticky Social Sharing bar‘ and showcasing your social media profile links.
To Sum Up,
This is it for how to set up AMP in WordPress. With the help of AMP, you can get multiple benefits for your site. It helps to rank your site higher on search engines like Google and maintain SEO.
Likewise, with the improved performance of your site, AMP helps to gain significant traffic. And as it continues, you get decent conversion rates and generate leads. Thus, it’s a wholesome solution for those sites that want to perform better and rank higher.
Not to mention, to create AMP pages is super easy with WordPress AMP plugins. And ‘The Official AMP Plugin for WordPress’ and ‘AMP for WP’ are perfect for it. With them, the process gets super easy and effective. Also, the best part is you get enough configuration options to customize it as per your requirements.
So, AMP is certainly recommendable for your WordPress site. And we hope you got enough ideas on how to implement AMP in WordPress.
If you wish to extend your site’s functionality, then you can go through our other articles. We recommend ‘How to Create a Custom Sidebar in WordPress?’ and ‘How to Add Social Share Buttons to Your WordPress Blog?’. They will definitely give you more ideas for your website!
At last, please don’t forget to share this article with your friends’ circle. The social media handles are right in front of you. Till then, ‘Keep Sharing, Keep Exploring’!