Wondering how to create a WordPress quiz form for your WordPress website? Then, this article is just the thing for you.
In this article, we’ll show you how you can create your own online quiz easily using Everest Forms without touching a line of code.
But before that, we’ll tell you why do you need to create a WordPress quiz form for your WordPress website. So, without further ado let’s get started.
Why Create a WordPress Quiz Form?
Quiz forms contain questions that can further be used to know your customers or gather information. Besides they’re always fun and engaging. Your users enjoy them and find them more rewarding than other forms.
Further, quizzes are a part of the content marketing strategy. For example, if you want to create engaging content for your audience? Simply ask your audience with a WordPress quiz.
Besides, there are various other benefits of WordPress quiz form which are:
- Quizzes are a fun and engaging way to present content to your users. They help you assess customer needs and meet their requirements.
- Quizzes help you gain more traffic and reduce bounce rates on your website.
- You can even link your quiz to your newsletter to build an email marketing list and gain more subscribers.
So, whether you create quizzes for fun or business purposes, they can be a powerful weapon for your WordPress site.
Choose the Best Plugin to Create a WordPress Quiz Form
There are many WordPress quiz plugins available in the market. However, we’ll be using Everest Forms, the clean and beginner-friendly WordPress form builder plugin.
Besides a user-friendly interface, Everest forms have many other top-notch features as well. Some of which are listed below:
- Option to create unlimited forms
- Multiple column layout options
- Form field customization options
- Spam protection
- Smart conditional logic
- Forms import and export and more
That being said, now let’s learn how you can create quiz forms using Everest Forms.
Creating a WordPress Quiz Form Using Everest Forms
Now, in order to learn how to create quiz forms on your website, just follow the simple steps below.
Step 1: Install and Activate Everest Forms
The first step would be installing and activating Everest Forms from your WordPress website. So, for that login to your WordPress dashboard.
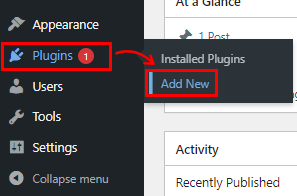
After that navigate to Plugins >> Add new from your dashboard.
Now type Everest Forms in the search bar. After you see Everest Forms on the search result, click on the Install Now button and Activate it.
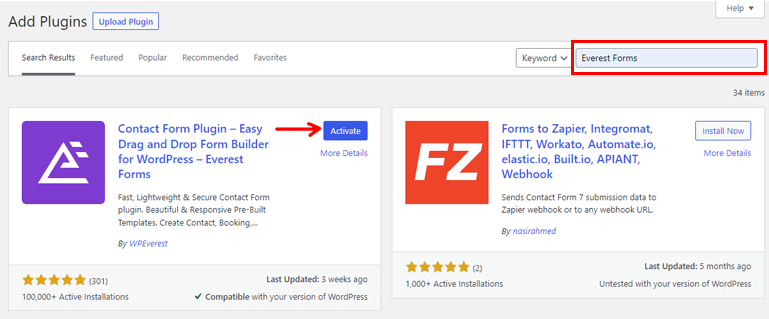
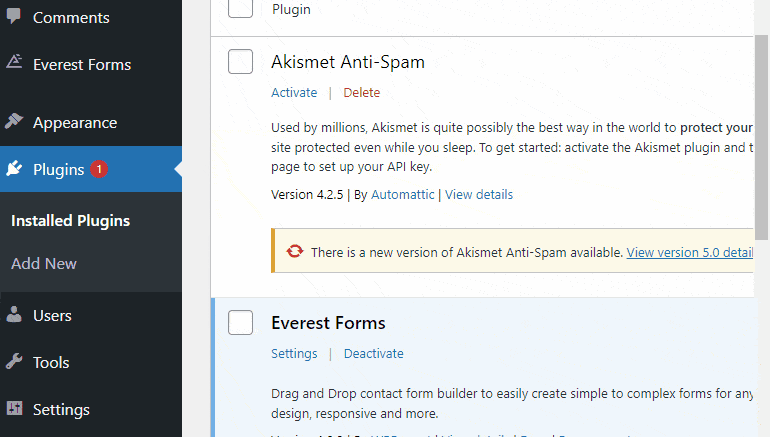
The free version of Everest Forms is now installed successfully.
Everest forms allows you to create a quiz form even with a free version. However, with a premium version of Everest Forms, you get access to Survey, Polls & Quiz add-on that offers many other features for your quiz form. So, we’ll show you how to install Everest Forms pro as well.
If you want a detailed guide, here’s a YouTube tutorial on how to Install the free version of Everest Forms?
1.1 Install and Activate Everest Forms Pro
To install and activate the pro version of Everest Forms, you need to visit Everest Form’s official website first.
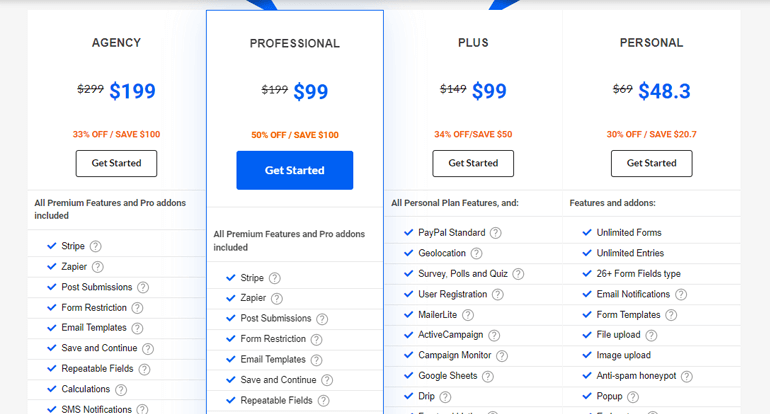
Everest Forms offers four different premium plans. So, choose the plan that suits you the best.
Once you purchase the Everest Forms pro, you’ll receive a link to your email. Follow the link and get access to your WPEverest customer dashboard.
Now, find the Everest Forms pro zip file under the Downloads tab and download it to your computer.
After that, go to Plugins >> Add New. Click on the Upload Plugin button. Now, choose the Everest Forms pro zip file that you’ve downloaded before and hit Install Now. Then, click on the Activate button to activate the plugin on your site.
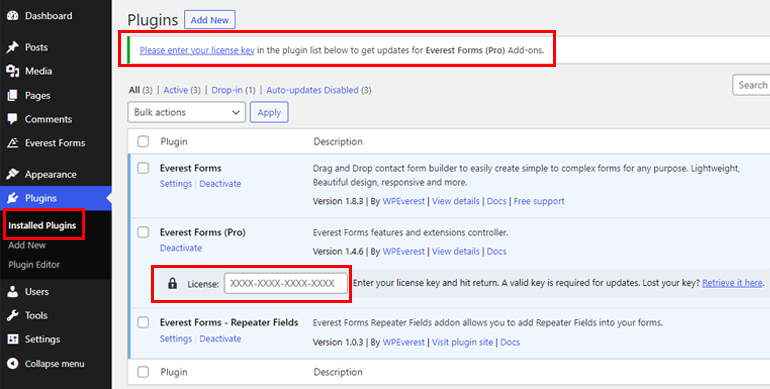
Once the premium plugin is activated, you’ll be asked for a License Key for Everest Forms Pro. You can find this key in your WPEverest dashboard under the License Keys tab. So, simply copy and paste it into the field under Everest Forms Pro, then press enter.
1.2 Install and Activate the Survey Polls and Quiz Add-on
Since you’ve got the pro version, you can now easily install any of the Everest Forms add-ons. For that navigate to Everest Forms >> Add-on.
After that, search for Survey Polls and Quiz Add-on. Then simply, click on the Install Addon button and press Activate like before.
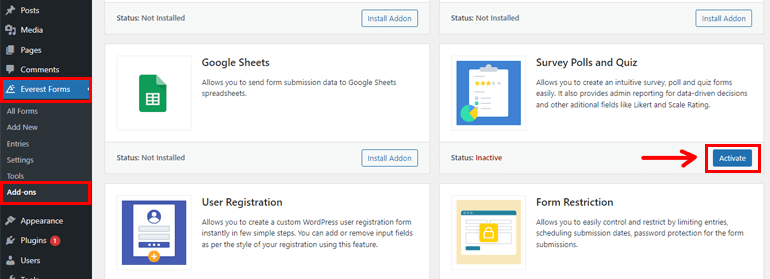
You’ll know the plugin is active when the status says Activated.
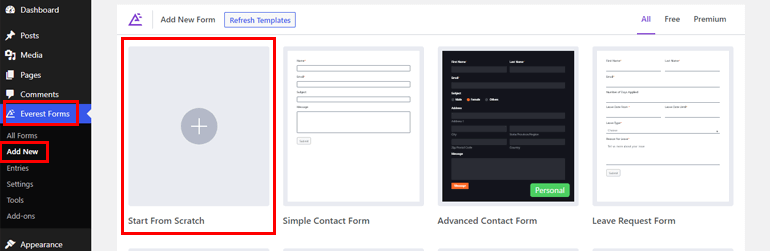
Step 2: Create a New Quiz Form
Once you’ve installed and activated Survey Polls and Quiz Addon, go to Everest Forms >> Add new. On the Add New Form page, you’ll find a collection of pre-built form templates. However, you can also start from scratch.
In this tutorial, we’ll show you how to create a form from scratch. So, click on Start From Scratch.
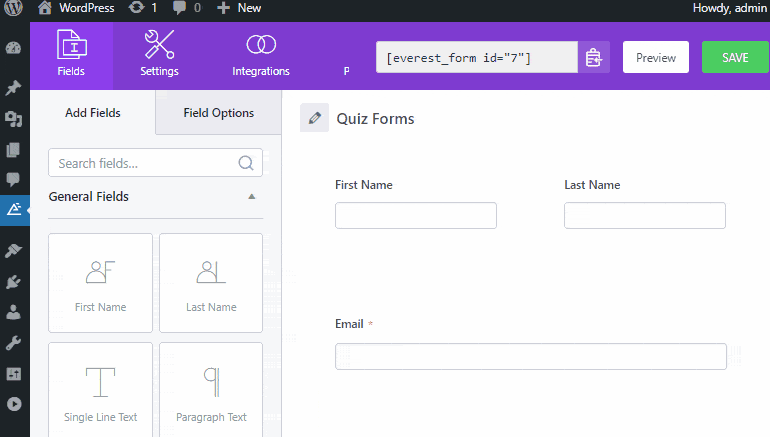
Now, a form builder window will open up. On the left side of your screen, you’ll see form fields that you can add to your form. You can simply drag and drop the fields on your right to the desired area to create your quiz.
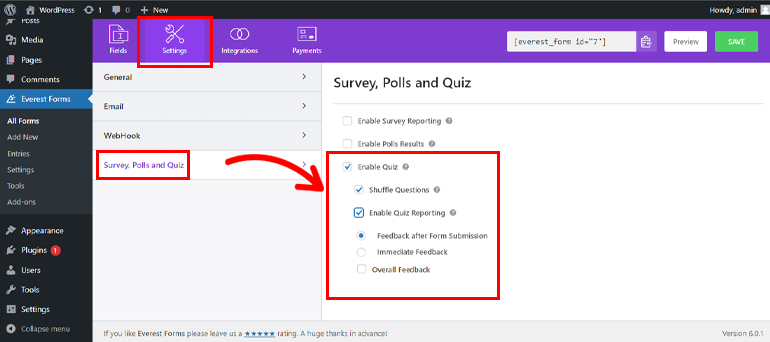
Step 3: Enable Quiz Settings for The Form
The first thing you need to do is enable the quiz setting, for that navigate to the Settings tab and click on the Survey, Polls, and Quiz on the left-hand side.
Then, checkmark on the Enable Quiz option, Now, you’re allowed to use the form fields for your quiz questions. Here you can see two options:
- Shuffle Questions: To shuffle your quizzes and display them randomly.
- Enable Quiz Reporting: To submit reports for your quiz.
If you check the Enable Quiz Reporting, it shows three more options:
- Feedback after Forms Submission: To send feedback to the user after quiz form submission.
- Immediate Feedback: To display the feedback immediately on the front as the user selects the answer.
- Overall Feedback: To add feedback after the completion of the quiz based on scores.
Step 4: Customize the Quiz
This is the main part where you create the actual quiz according to your preference.
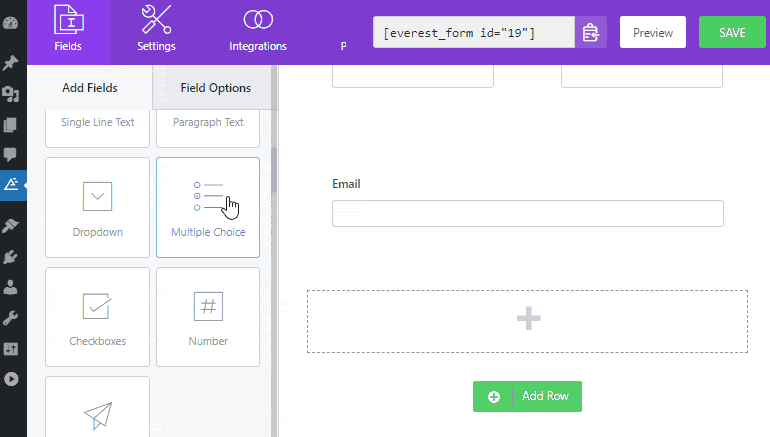
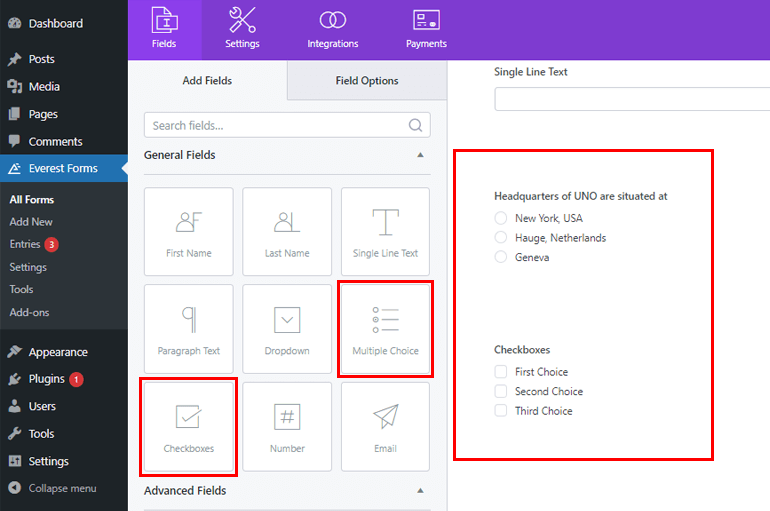
4.1 Adding Questions to Your Quiz
Once again go back to the Fields tab to add the essential fields to your form. Here, you can find fields for creating your quiz such as Single Line Text, Multiple Choice, Checkboxes, etc.
Simply drag and drop the suitable field on the right side of your form builder.
Furthermore, you can also customize your form fields from the Field Options tab. For instance, you can change the Label for your questions and add choices from Choices option by clicking on the multiple-choice question fields.
You can even add pre-built choices or add your own bulk choice from the Bulk Add option and add images from the Image Choices option.
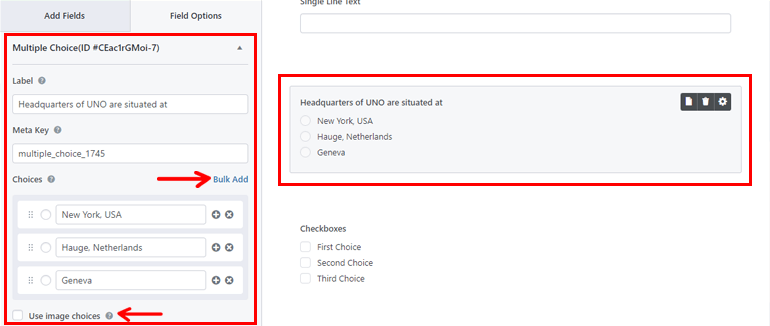
You can add more questions in the same way.
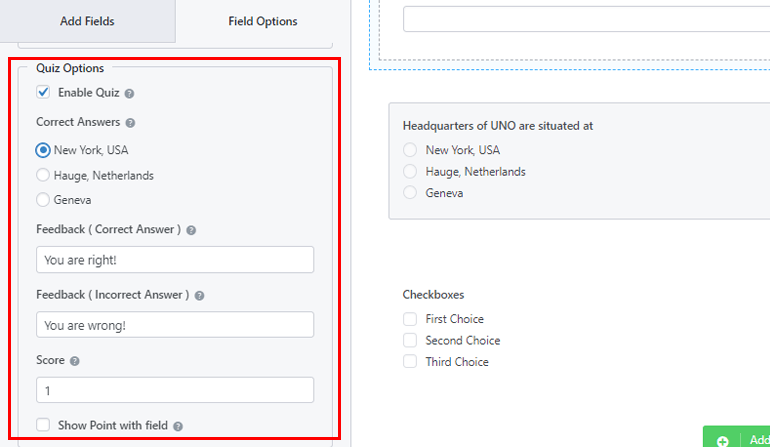
4.2 Quiz Field Options
The next step is to add the Quiz Options for the field. For that press the Survey & Quiz Options under the Field Options tab.
Here add the correct answers, and also add feedback for both the correct and incorrect answers. You can also assign scores for the questions.
Step 5: Add Quiz to Your WordPress Site
You’ve successfully created a quiz form using Everest Forms. But, it won’t be visible to your users unless you display your quiz form on your WordPress website.
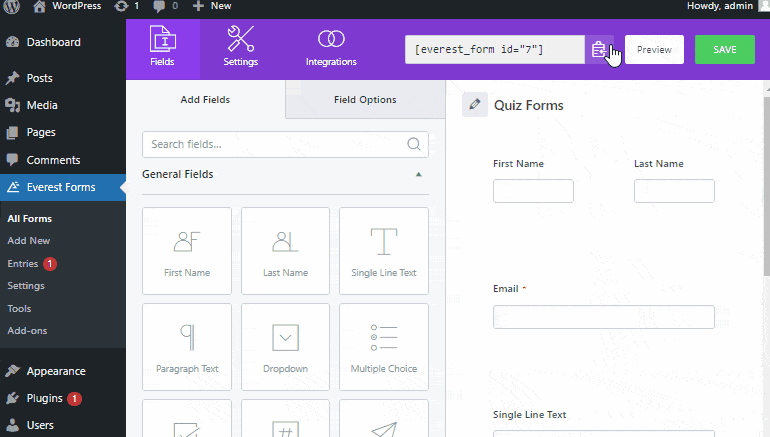
Hence, to add quizzes to your site, you can use two methods, one is by using shortcode.
For that navigate to Everest Forms >> All Forms. There you’ll see the form you’ve created along with its shortcode. Now copy the shortcode of your quiz form to display it on your site
The next thing you need to do is create a new page or post, you’ll get to the Gutenberg editor. Here press on Add Block icon and search for the Shortcode block and click it to add a block. Now paste the shortcode you just copied and click on the Publish button.
The next option is by using the Everest Forms block for that. Alternatively, go to Posts/Pages >> Add New.
Then, click on the Add Block (+) button and search for the Everest Forms block and click it. After that, select your WordPress quiz form from the drop-down menus. Finally, you can hit the Publish button at the top.
Step 6: View Your Quiz Results
With Everest Forms, you can also view your quiz results directly from your WordPress dashboard. The plugin even provides you with a graphic representation of your quiz results.
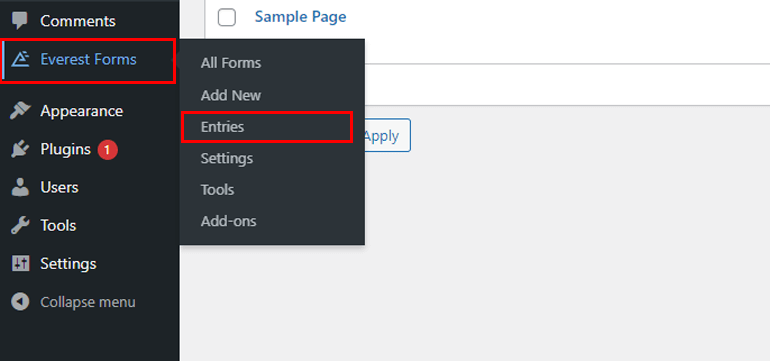
For this, navigate to Everest Forms >> Entries and select your quiz to view results.
Here, you’ll find the reports of Total Submission, Complete Submission, Incomplete submission, etc.
Wrapping It Up!
We’ve come to the end of the article. We believe you’ve learned how to create quizzes in WordPress easily by now.
Everest Forms is a feature-rich plugin that helps you add quiz forms to your site without any fuss. To find out more about this feature-rich plugin visit Everest Forms review.
If you’re interested also check out our article on how to make multi-column form in WordPress. Finally, if you like this blog, feel free to share it, also follow us on Facebook and Twitter for future updates.