Want to create LMS with WordPress but, don’t know how? It seems like you’ve landed in the right place.
For a couple of years, online learning platforms have gained immense popularity. And, given the circumstances, it’s the best option right now. Further with the help of WordPress, even a non-tech person can create and sell courses without any hassle.
Whether you want to sell your music course, photography course, cooking course, art course, or simply want to teach online; this article will help you achieve that. So, without further ado, let’s get started.
What is an LMS Website? Why Is It Important?
In simple words, Learning Management System is software to create, manage, and sell online courses. Approximately 83% of organizations use an LMS currently? And, according to a study, the global LMS market is expected to reach a value of $23.21 billion by 2023.
Some of the importance of a Learning Management System is given below:
- Freedom to Create and Manage Online Courses: The first and foremost benefit of the LMS site is that you can create as many courses as you want. Additionally, it allows selling courses.
- Supports Different Formats: You can add images, texts, audio, and videos to make your courses more exciting and fun.
- Centralized Learning: If you own a big company and want to give courses to your employees, LMS allows you to organize and store big data in a single location.
- Gamification: Various badges, points, awards, and so on are also available to distribute to students for appreciating their achievements.
- Reports: It’s super easy to track and manage courses as well as students’ progress.
- Content Drip: Content drip enables you to release content on your site slowly and according to your schedule. Thus, students can access the content only as they progress through the course.
Having said that, let’s start the guide on how to create an online course in WordPress without delay.
Step By Step Process to Create LMS With WordPress
1) Purchase Domain Name, Web Host & Install WordPress
The process to create LMS with WordPress is incomplete without purchasing a domain name and web host. In fact, purchasing a domain name and web host is the very first step while creating any sort of website.
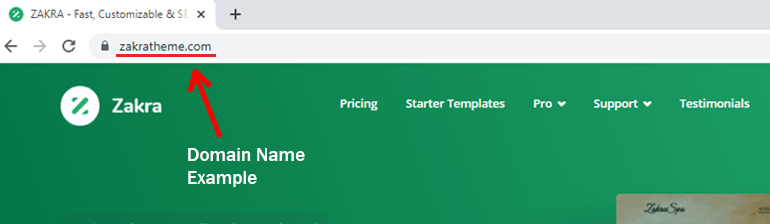
Simply put, a domain name is the name of your site through which users will search it on the internet. For example, Zakra.com is the domain name of our site. Similarly, some famous domain names are Google.com, Amazon.com, etc.
On the other hand, a web host is a webspace on the net where all your site’s data and files are stored. So, let’s discuss how to buy a domain name and a web host to create LMS with WordPress next.
i) Purchase a Domain Name and Web Host
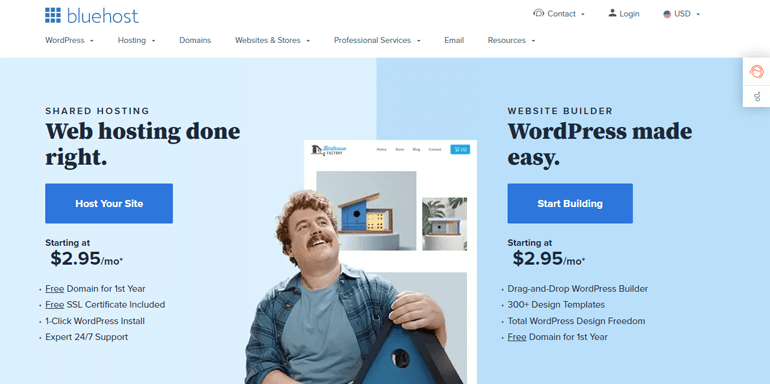
For this tutorial, we’re going to use Bluehost, as it’s one of the most trusted and popular domain name registrars. Firstly, visit the site and click on the Host Your Site button.
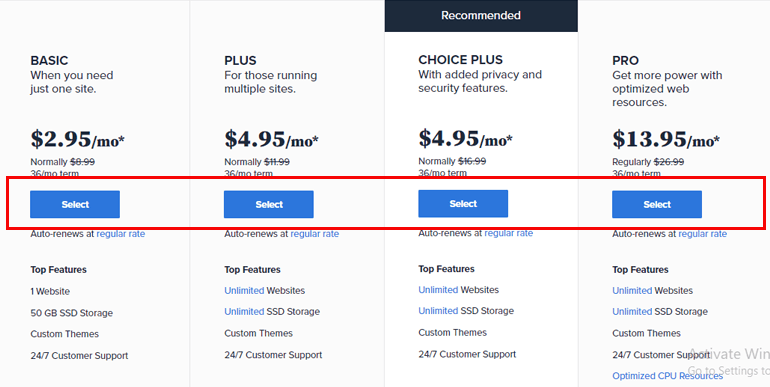
This takes you to the Pricing Plan page. You can see four different plans. Choose the plan according to your needs.
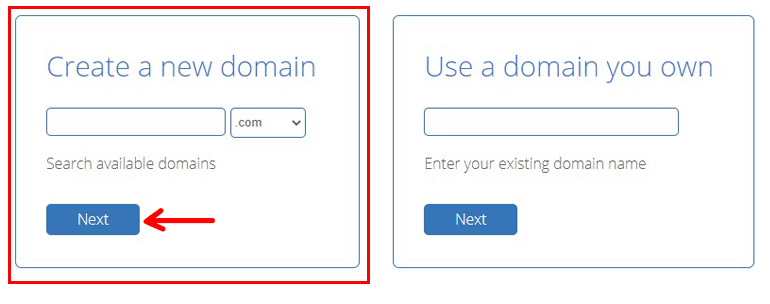
Next, you need to create your domain name. For that, simply click Create a new domain option and press the Next button.
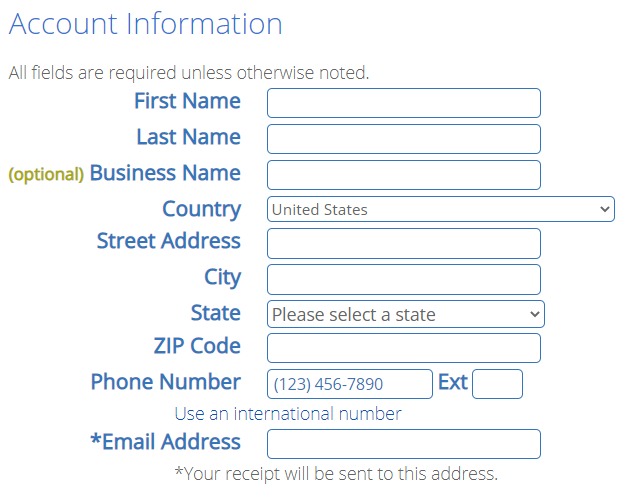
Then, it takes you to Create your account page, where you need to fill in all the necessary information, such as Account Information, and Payment information. Moreover, tick on the Auto-Renewal Terms and click on the Submit button.
And that’s it; you just bought yourself a domain name and web host to create LMS website in WordPress.
ii) Install WordPress
Another reason to choose Bluehost is that it offers an Automatic WordPress Installation feature. Meaning while purchasing a web host, WordPress is automatically installed.
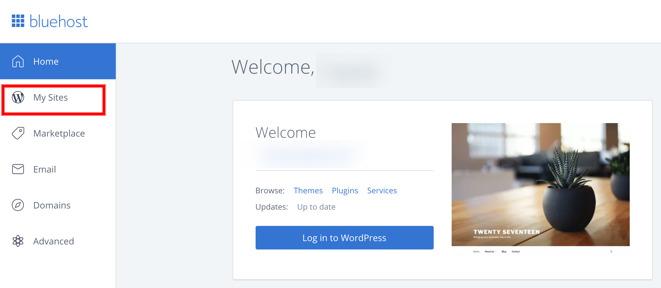
Nevertheless, sometimes that might not be the case. In that situation, it offers a One-Click Installation feature. To install WordPress in a single click, log in to your hosting account by entering your Email or Domain Name and Password.

Select the My Site option from the sidebar after you’ve logged in.
Now, click on the Create Site and enter the Site Name and Tagline of your preference, and hit the Next button.

WordPress is now automatically installed. Now, all there’s left to do is log in to your WordPress dashboard.
2) Install a WordPress Theme
The second step on how to create an online course on WordPress is to install a suitable WordPress theme. There are thousands of WordPress themes available on the web, both free and paid.
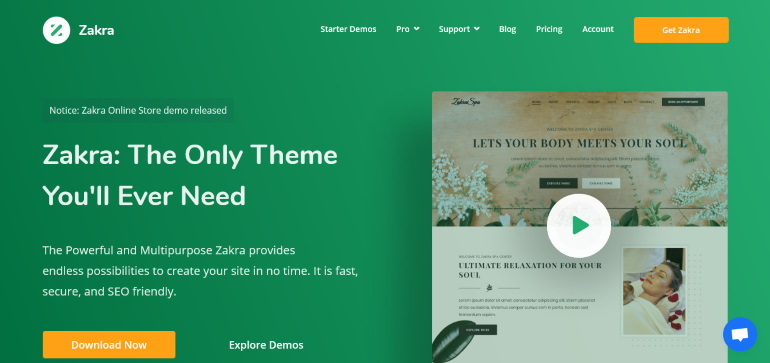
Zakra is the product we highly recommend as it’s a multipurpose theme. You can use the theme to create any type of WordPress website. It has a responsive design, is translation-ready, SEO & speed optimized.
i) Install Zakra Theme
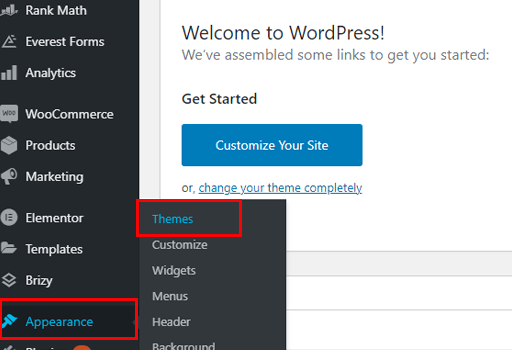
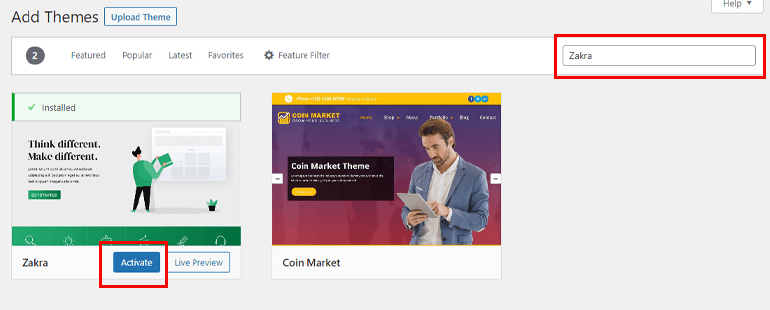
Zakra is a freemium theme hence, you can install the Zakra theme directly from your WordPress dashboard. Simply go to Appearance >> Themes from the sidebar of the dashboard.
Then, click on the Add New button. Search Zakra on the search box and select the Install button. Lastly, don’t forget to Activate the theme.
ii) Install Zakra Premium Version
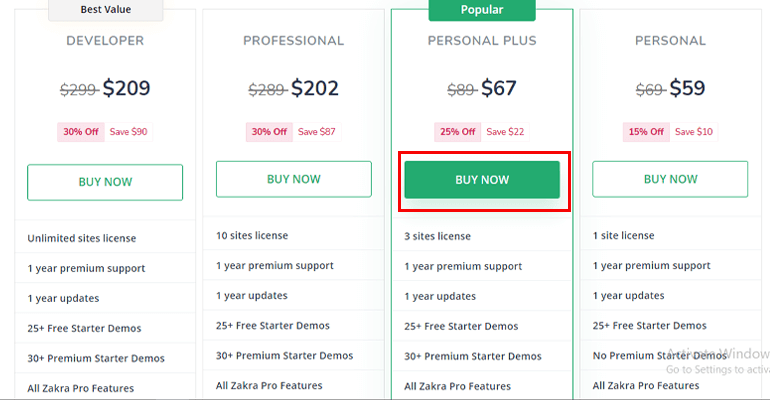
To install the premium version, visit the official homepage of Zakra. Click the Pricing menu from the top bar.
You can see four different pricing plans. Select the Buy Now button and purchase the Personal Plus or above plans. That’s because premium demos are only available on Personal Plus or above plans.
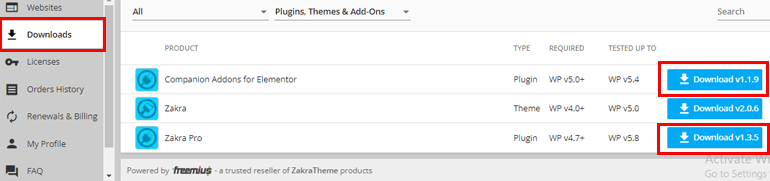
Now, log in to your account with the help of the credentials that you get on your email. After logging in, download the Zakra Pro plugin and Companion Addons for Elementor and save the zipped file on your computer.
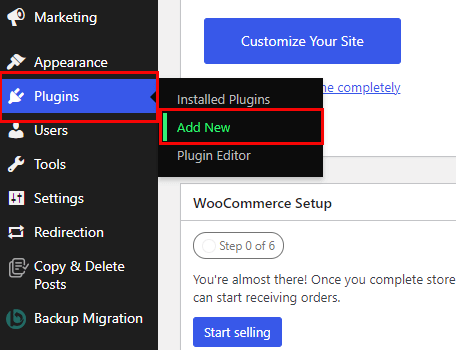
Then, navigate to Plugins >> Add New from your WordPress dashboard.
Press the Upload Plugin button. Thereafter, Choose Zakra Pro you downloaded earlier, Install, and lastly Activate it. In the end, enter the License Key. You can find find the license key under the License tab in your account.
Likewise, install the Companion Addons for Elementor.
iii) Import Demo
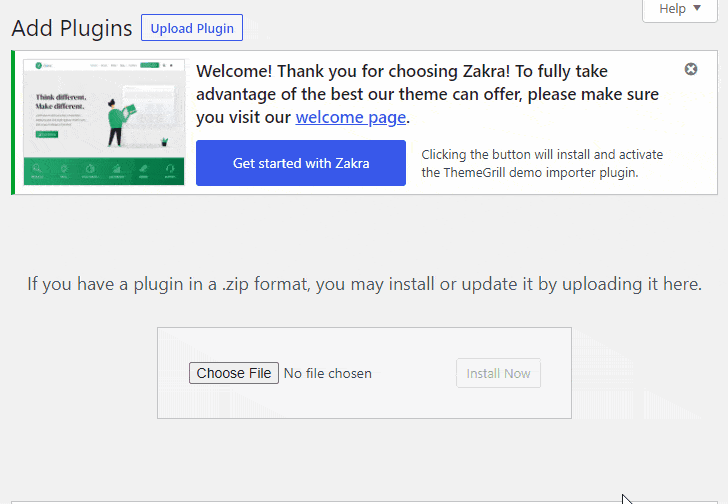
After the theme’s installation, you can see a Welcome Message at the top of your WordPress dashboard. Select the Get Started with Zakra button.
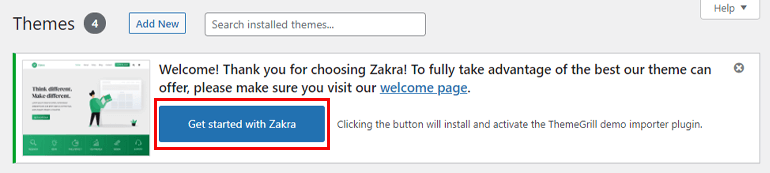
Next, ThemeGrill Demo Importer is automatically installed and it takes you to the demo page. Since we’re creating an LMS WordPress website, import the Online Course demo.

Click on the Import button. A confirmation popup appears; just select the Confirm button. And that’s it, your demo is imported. You can further customize the theme as per your need.

Here’s a full guide on how to get started with Zakra Pro.
3) Select a WordPress LMS Plugin (MasteriyoLMS)
Another important step on how to create LMS website in WordPress is to choose and install a good WordPress LMS plugin. By selecting an easy-to-use WordPress LMS plugin, you’ll win half the battle. Hence, choose wisely.
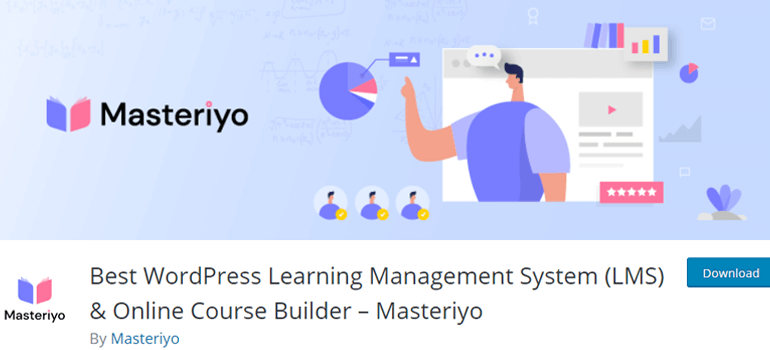
Masteriyo LMS is the WordPress plugin that we highly recommend. Below are some of the key features of this LMS plugin:
- Drag and Drop Course Builder: Easily create and manage courses with a simple drag and drop feature. You don’t need coding knowledge to create a full-fledged LMS WordPress site.
- Interactive Learning Page: Students can ask questions while taking courses. Furthermore, registered students, along with the admin, can answer those questions.
- Course Progress Bar: The plugin comes with a progressive bar at the top so that students can track their course curriculum.
- Course Page Navigation: There’s vertical navigation available on the left side to know your course progression.
- Distraction-Free Learning Page: The students get full access to hide the header and navigation to avoid distraction from the course.
- In-built Order System: You can effortlessly track your order system. To add more, Masteriyo LMS offers offline payment and supports PayPal gateway as well.
- Students Account Page: Users get their own account page. Hence, they can track their orders, purchased courses, and more. Also, students can edit their information according to their needs.
Now that we know how amazing the Masteriyo LMS plugin is. It’s time to install the plugin, create LMS with WordPress, and teach online.
i) Install Masteriyo LMS
One other great feature about this WordPress LMS plugin we cannot miss out on is it does not cost a penny. Therefore, it’s completely free of charge to install.
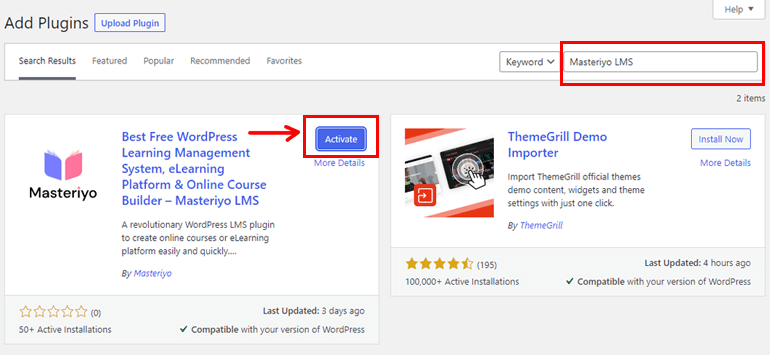
To install the plugin, navigate to Plugins >> Add New from the sidebar. Now, search Masteriyo LMS in the search box. Then, click on the Install Now button, and lastly, Activate the plugin.
4) Configure Masteriyo LMS Settings
As soon as you activate the plugin, the Welcome page appears. You can either set up the plugin by clicking the ‘Start Now’ button. Or, you can do it later by clicking on the ‘Skip to Dashboard’ button.
For now, we’ll be configuring the settings right away. So start by hitting the Start Now button.

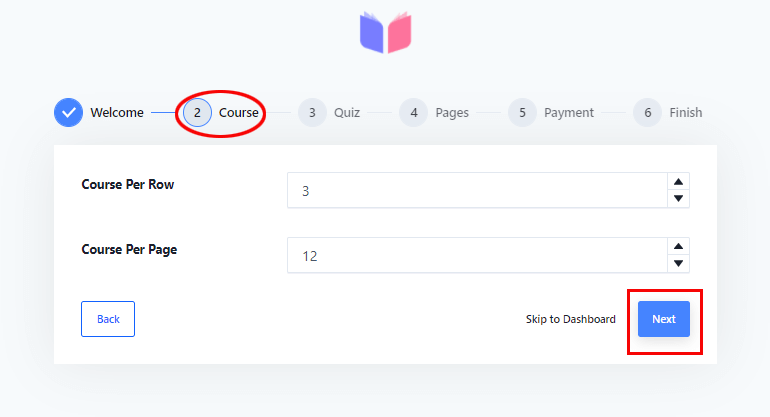
In the second step, you need to set up the Course. Here, you can choose Course Per Row and Course Per Page. Click on the Next button to continue.
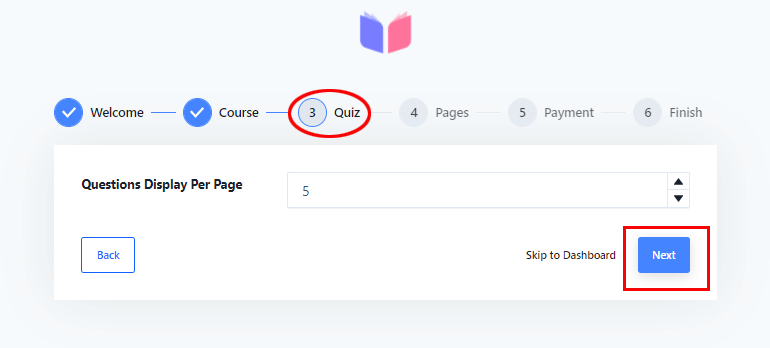
Thereafter, set up how many Quiz questions you want to display per page.
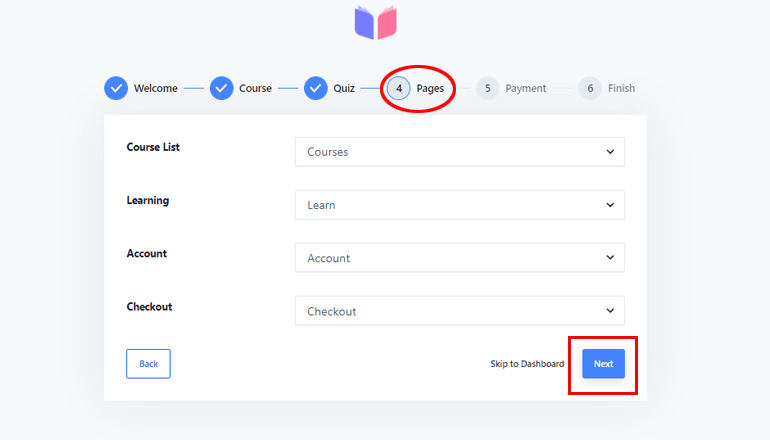
Furthermore, you can select the Pages you want to display. Choose between Course List, Learning, Account, Checkout, and Sample Page.
The next step is to set up the Payment methods. Masteriyo LMS offers very conventional ways to integrate the payment gateways. Additionally, it allows choosing the Currency of your choice. You can even select Currency Position, Thousand Separator, Decimal Separator, and Number of Decimal.
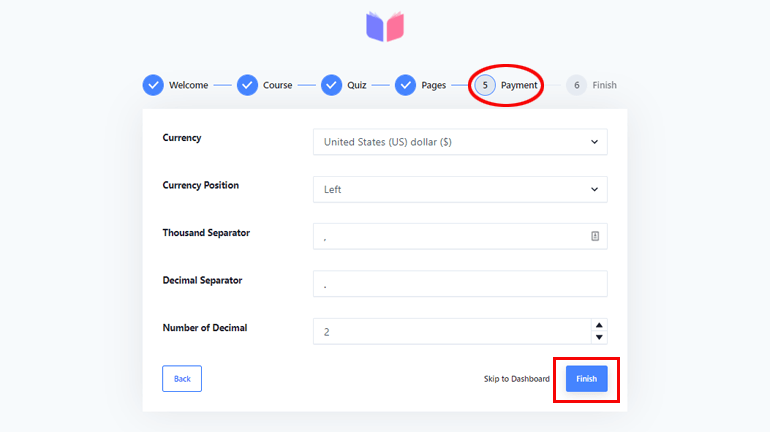
Finally, complete the process by clicking on the Finish button.
5) Add New Courses, Lessons, and Quizzes
After you complete the setup process, you can either Start a New Course or go Back to Dashboard.
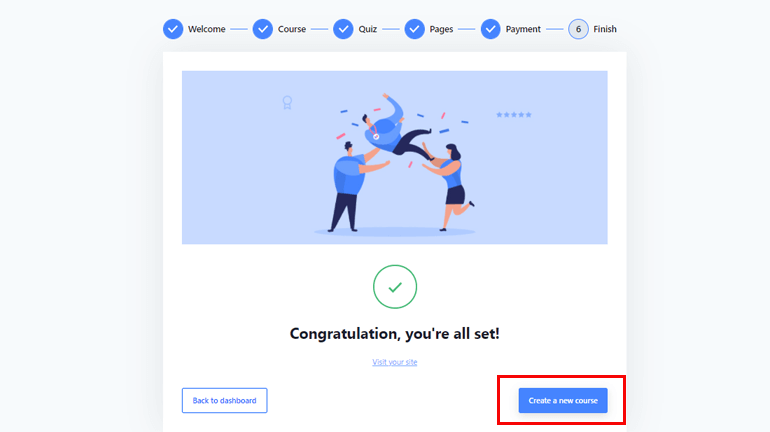
It’s better to start creating a new course to save some of your precious time. When you click on the Start a New Course, it takes you to the course builder page.
This WordPress LMS plugin allows you to create LMS in WordPress from a single interface. Unlike other LMS plugins, you don’t have to go back and forth to create a single course.
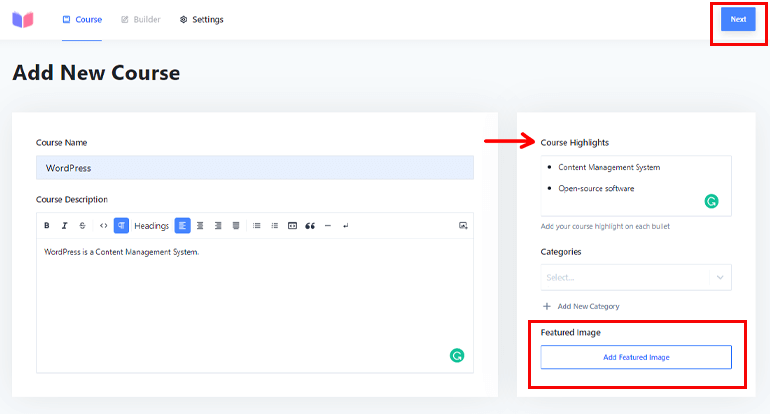
i) Add New Course
In order to create a course, firstly, write the Course Name. Then, add a Course Description. Also, you can customize the description by making it bold, italic, adding quotes, and many more.
Additionally, you can also add Course Highlights and Categories from the same interface. This plugin even allows you to upload Featured Image for your course. Then, click on the Next button located at the top right.
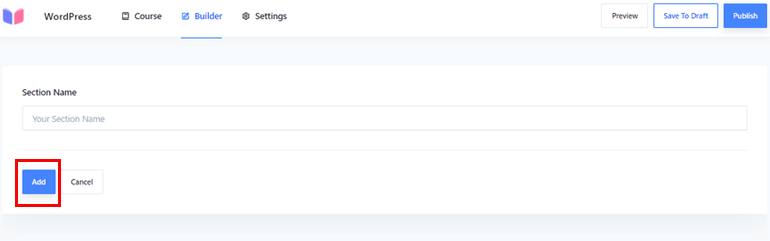
Thereafter, you can start adding a New Section to your course.
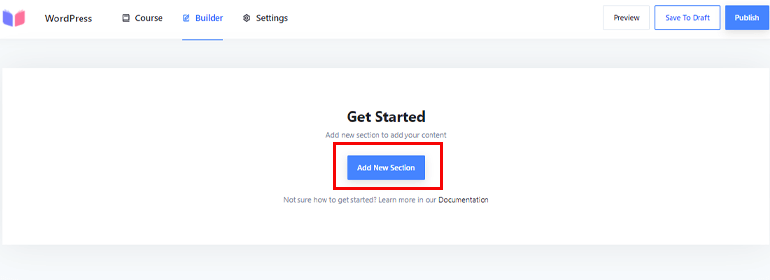
Type a Section Name and hit the Add button.
You can either Add New Content for your new section or Add New Section.
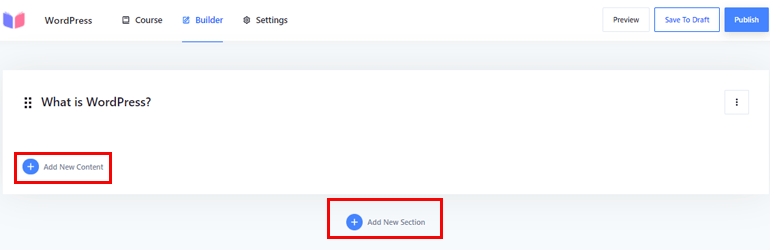
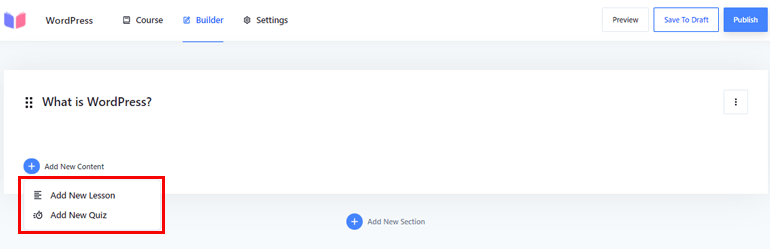
Under the add new content option, you can further Add New Lesson and New Quiz.
ii) Add New Lesson
To add a new lesson, first of all, start by adding a Lesson Name. Then add Lesson Description.

Further, you can add Featured Image. This LMS plugin allows you to add video as well. You can add a Self Hosted video, Youtube video, or a Vimeo. Once done, click on the Add New Lesson at the bottom.

You can add as many lessons as you wish.
iii) Add New Quiz
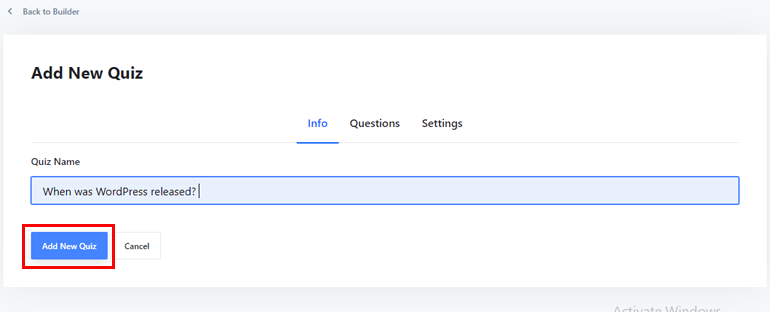
You can add quizzes from the course builder page. Just click on the Add New Content >> Add New Quiz. Type a Quiz Name then, select the Add New Quiz button.
Next, click on the plus (+) icon to add new questions.
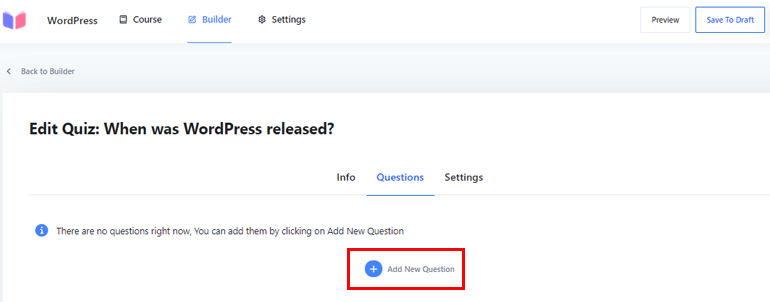
Now, write the Question Name. Then choose Question Type between True False, Single Choice, and MultiChoice. You can also give Points as per your preference.
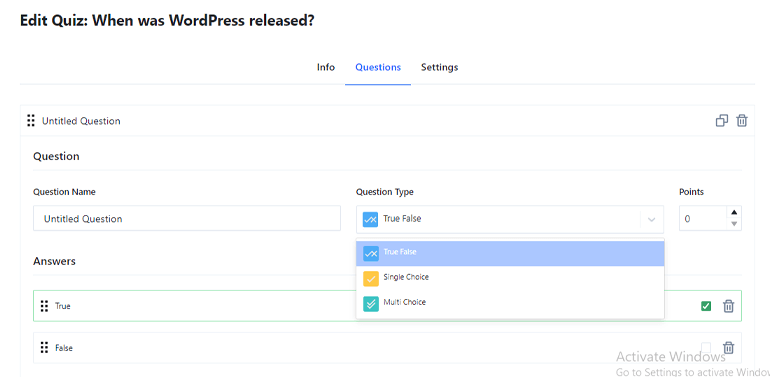
Add the correct answer to the Answer section. Simply tick on the box of the correct answer. You can also delete the answer later if you want. For multichoice, you can tick on multiple answers. To save all the changes, hit the Update button.
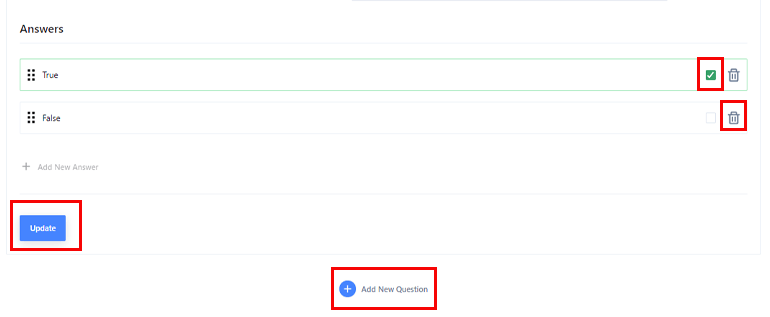
You can add as many questions as you want by clicking on the Add New Question option as shown in the above image.
iv) Configure Other Settings
The next step on how to create LMS site in WordPress is to configure the plugin’s settings. There are 3 further options under settings – General, Display, and Pricing.
Under the General settings, you can choose the Difficulty level from Beginner, Intermediate to Expert.
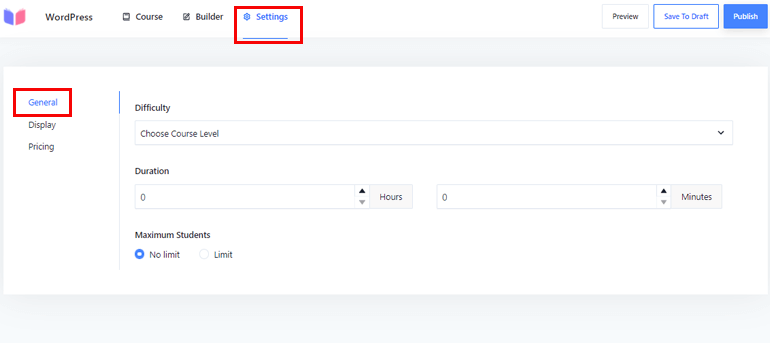
The course Duration can be selected as well. Along with that, the plugin enables you to choose the Maximum Students. You can either Limit the number or keep No Limit.
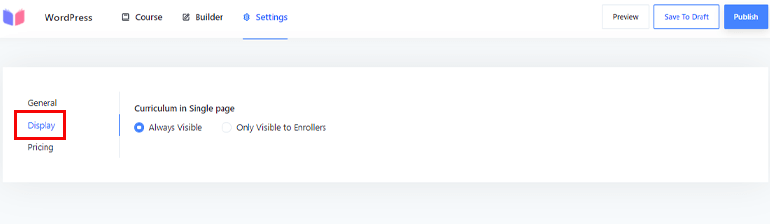
The second option is Display. From here, you can decide whether your Curriculum in Single Page is Always Visible or Only Visible to Enrollers. This is a great option if you want some content to be available for certain members only.
The Pricing option is the last. Here, you can choose to sell your course for Free. There are two options if you want your course to be free. First is, you can make your free course available to everyone i:e. a student who Does not need registration. Or, students Need registration to access the free courses as well.
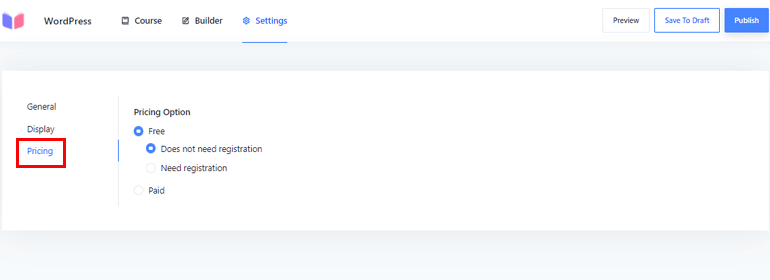
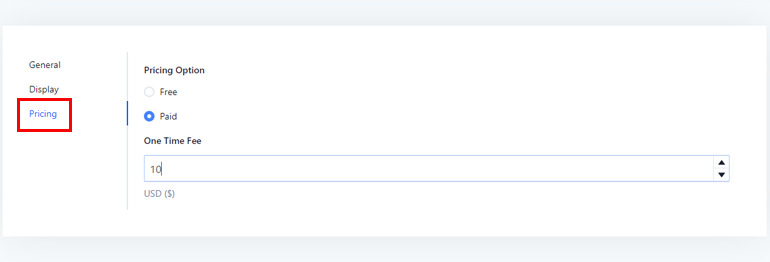
However, if you want to charge for your courses, then choose the Paid option. After you enable this option, an option appears where you can put the amount you want to charge.
4) Publish Your Course
Once you’ve added a new course, lessons, and quiz, you’re ready to publish it. However, click on the Save to Draft option if you’re unsure and want to make further changes or add more courses later. Otherwise, select the Publish button. Before publishing, you can see the Live Preview as well.

Wrapping It Up!
Finally, it’s a wrap. If you are someone passionate about sharing your knowledge, creating an online course in WordPress is the right step. Simply follow the above guide, and your LMS site will be ready to go live by the end of the day.
Here’s a revision of the steps you need to follow:
- Purchase a Domain Name, WebHost, and Install WordPress
- Install a WordPress Theme
- Select a WordPress LMS Plugin
- Configure Masteriyo LMS Settings
- Add New Course, Lesson, and Quiz
- Publish Your Course
Especially with the help of the Zakra theme and Masteriyo LMS plugin, the process to create LMS with WordPress will feel like a walk in the park. And of course, you can use Bluehost to easily host your site.
We hope you enjoyed reading this article, and if you did, why not share it on your social media.
Before you go, here’s a guide on how to improve SEO on WordPress to rank higher on search engines. Also, follow us on Twitter and Facebook to keep updated about our blog.


![Zakra 3.0 | Zakra Pro 2.0 Release [Major Updates!]](https://i.ytimg.com/vi/g3rifl7kWvg/maxresdefault.jpg)