Don’t know how to make a transparent header in WordPress? Then, this is the article you’ve been searching for.
A transparent header makes your page look unique and stylish. Enabling this option will make the primary header section transparent and pull the content below the header to the top.
If you want to learn how to make a transparent header in WordPress, then make sure to read the article till the end. Without further ado, let’s begin.
Best Method to Make a Transparent Header in WordPress
Even though you want a transparent header on your WordPress website, you may not know how to do so. Well, one of the easiest methods to add a transparent header is using a WordPress theme.
Now, the big question is which theme to use. Don’t worry; we’re here for that. If you ask us, we highly recommend using the Zakra theme.

Zakra is a multipurpose WordPress theme with over 60,000 active users. Along with that, it has 80+ demos that you can import with just a click. Customizing the page’s content won’t be a problem as it’s a highly customizable theme.
Moreover, it’s SEO optimized and optimized for speed. Hence, your page will rank higher on search engines.
We think you’re now convinced about how amazing the Zakra theme is. So, let’s make a transparent header in WordPress using Zakra.
Steps to Make a Transparent Header in WordPress
Step 1: Install and Activate Zakra and Zakra Pro Add-on
First thing first, you need to install the Zakra theme. To install Zakra, firstly, log in to your WordPress dashboard. Next, navigate to Appearance >> Themes.
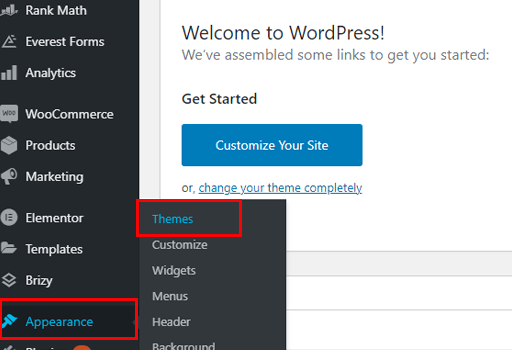
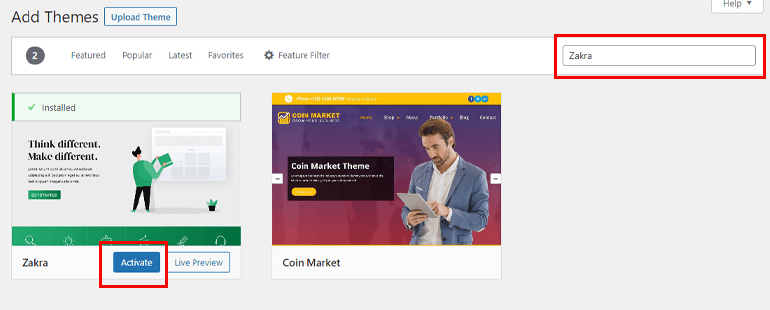
Then, click on the Add New button located at the top left. Search for Zakra on the search bar. Once it appears on the search result, click on the Install button. Lastly, Activate the theme.
However, you cannot enable the transparent header option yet. That’s because you need the Zakra Pro add-on for this.
Install Zakra Pro Add-on
In order to install and activate the Zakra Pro add-on, visit the official site of Zakra. Then, select the Pricing option from the top menu bar.

Zakra offers four different plans. Choose the plan that suits you best and hit the Buy Now button.
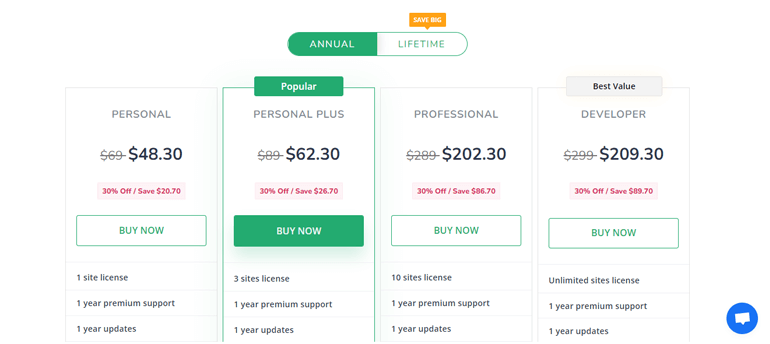
Note: Above is the Annual pricing. Zakra also offers Lifetime plans. With Lifetime plans you’ll get lifetime support and updates.
Fill out all the necessary payment fields and purchase the plan. An invoice is sent to your mailing address (that you added while buying the premium plan) along with the login credentials to your Zakra user account.
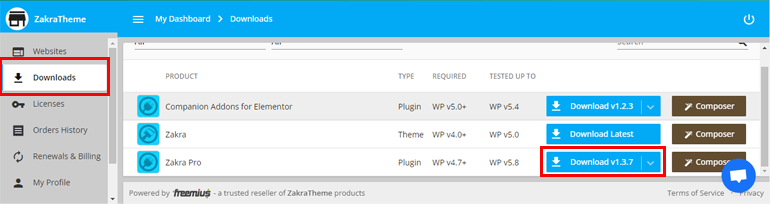
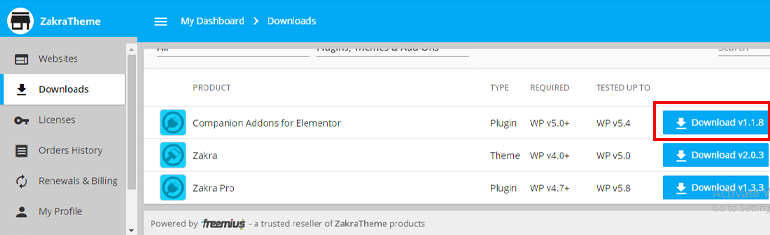
With the help of login credentials, log in to your user account. You can see the Download tab. From there, download the Zakra Pro add-on and save the zipped file to your computer.
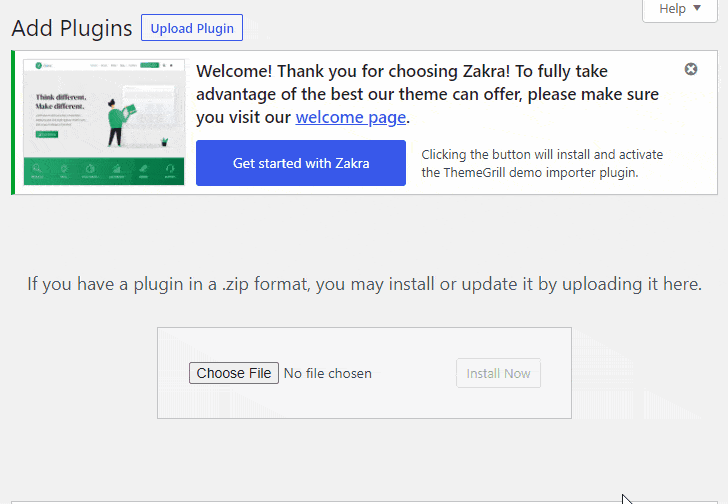
Now, go to your dashboard. Navigate to Plugins >> Add New. Thereafter, click on the Upload Plugin option.
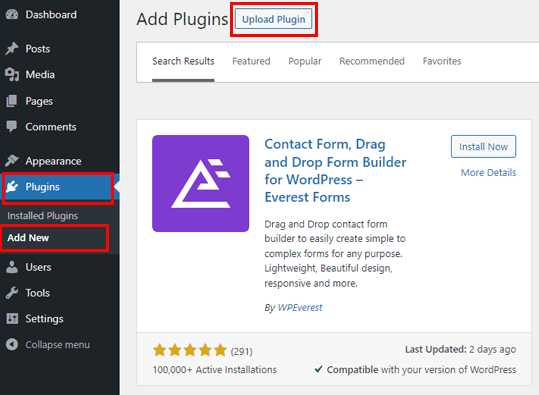
Choose the zipped file from earlier and press the Install Now button. Don’t forget to Activate the plugin.
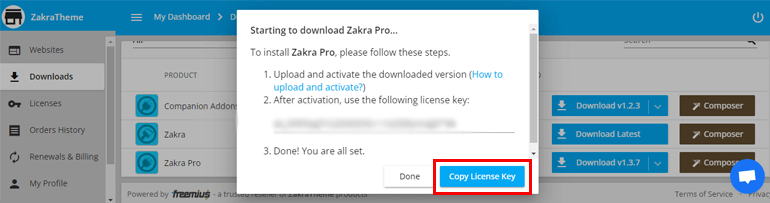
From your Zakra user account, copy the License Key.
Paste the key and hit the Agree & Activate License option.
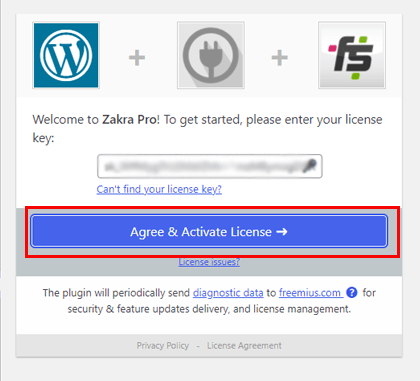
That’s it; we’ve successfully activated the Zakra Pro add-on.
Import Zakra Demo
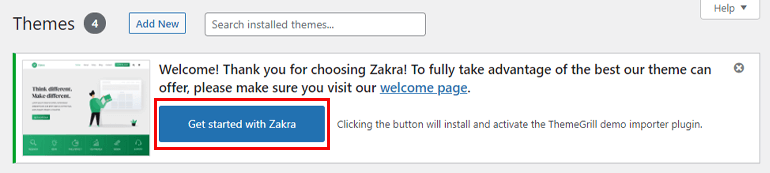
If you notice carefully, you can see the Get Started with Zakra message at the top. Pressing this option will automatically install the ThemeGrill Demo Importer plugin.
After that, it takes you to the demo page. If you wish to import the premium demos, download the Companion Addons for Elementor plugin from the Zakra user account.
Now, upload the plugin into your dashboard just like you uploaded the Zakra Pro add-on.
Hover over to the demo of your choice and click on the Import button. A pop-up will appear; select the Confirm button. Wait for a few seconds, and the demo will be imported.

Step 2: Enable Transparent Header Option
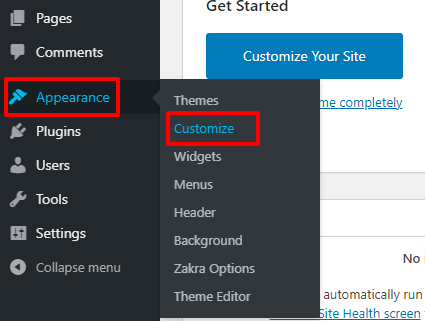
After the installation of the Zakra and Zakra Pro add-on, we can finally make the header transparent. Simply go to Appearance >> Customize.
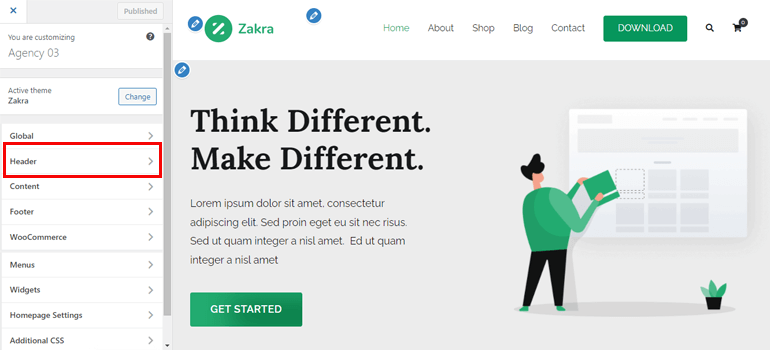
The customizer page will appear. On the left panel, you can see the customization options. Similarly, on the right side, all the contents are available. One of the best things about Zakra is you can see all the changes live.
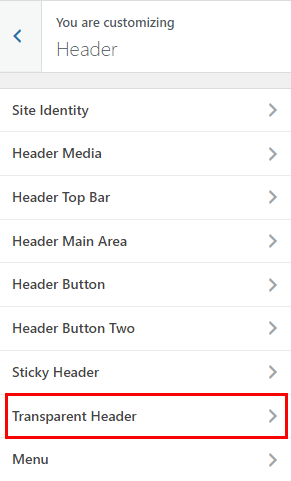
Next, from the customization menu, go to the Header option.
There are many options; you need to navigate to the Transparent Header section.
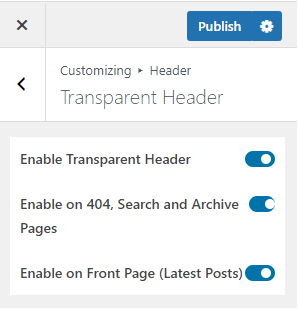
Again, Enable Transparent Header option will appear. As soon as you enable this option, other options will appear below.
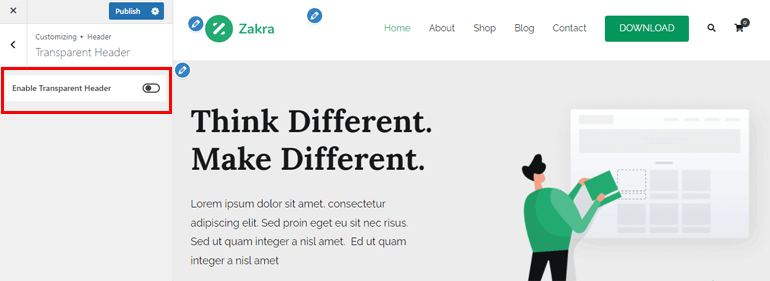
- Enable Transparent Header: If you enable the transparent header, all the pages of your site will have a transparent header.
- Enable on 404, Search, and Archive Pages: As the name implies, the 404, Search, and Archive pages will have a transparent header once you enable this option.
- Enable on Front Page (Latest Posts): By default, a static page is displayed on the front page of your site. However, you can also choose to display the latest post. Enabling this option will add a transparent header to these latest posts.
Step 3: Configure Header Settings
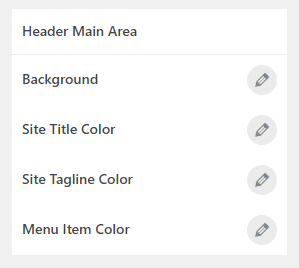
After you enable the transparent header, it’s time to customize it. Under the Header Main Area section, you can find customization options. We’ve discussed them below.
- Background: You can change the background color of the transparent header. Further, you can also add a background image.
- Site Title Color: Select the color of the site title of the transparent header. You can also add the color of the site title on Hover.
- Site Tagline Color: Add the site tagline color from this customization menu.
- Menu Item Color: From this option, you can add the color to the menu item of the transparent header. Moreover, you can also change the color of the menu item on Hover. Additionally, you can also set the color of the Active menu item.
Step 4: Publish Your Page With the Transparent Header
By far, we enabled the transparent header as well as customized it. All there’s left to do is publish your page.
This is probably the easiest step in this tutorial. Simply click on the Publish button located at the top of the customization option.
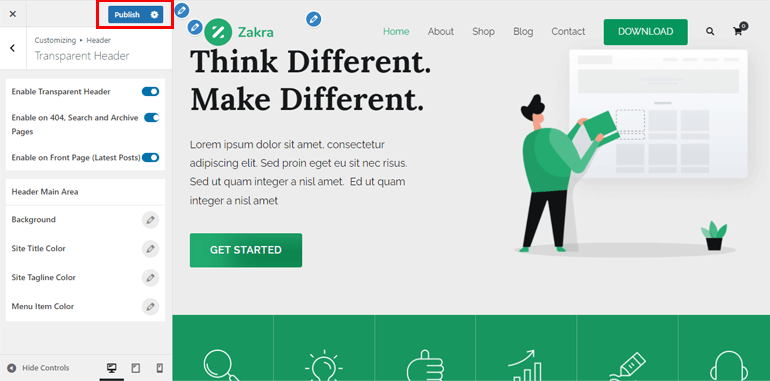
You can Preview your page to see the final result. Further, you can modify it if you want to.
Wrapping It Up!
And that’s how you can make a transparent header in WordPress. Also, please remember that we’ve used the Zakra theme and Zakra Pro add-on here. Besides, to import the premium demos, you’ll also need the Companion Addon for Elementor.
Zakra comes with multiple customization options for the transparent header. Hence, you don’t even need coding skills to enable the transparent header option.
Finally, it’s time to end this article. If you liked this article and learned something new, please share it with your friends and family on social media. You can also follow us on Twitter and Facebook for regular updates and exciting news.
Before you go, here’s an interesting article on how to create a custom homepage in WordPress.


