Fonts enhance the look of your site. There are many sources to find appropriate fonts for your site like Google Fonts, Adobe Fonts, etc. There are various methods of adding your custom fonts on your site. You can choose anyone.
Method 1: Manually Add Google Fonts in Theme’s files.
First step: Create a child theme( Guide: How to create Child Theme ).
Second step: Choose your required fonts from Google fonts library. Click on Select this font, you can see embed code there.
It looks like this:
<link href="https://fonts.googleapis.com/css?family=Roboto&display=swap" rel="stylesheet">
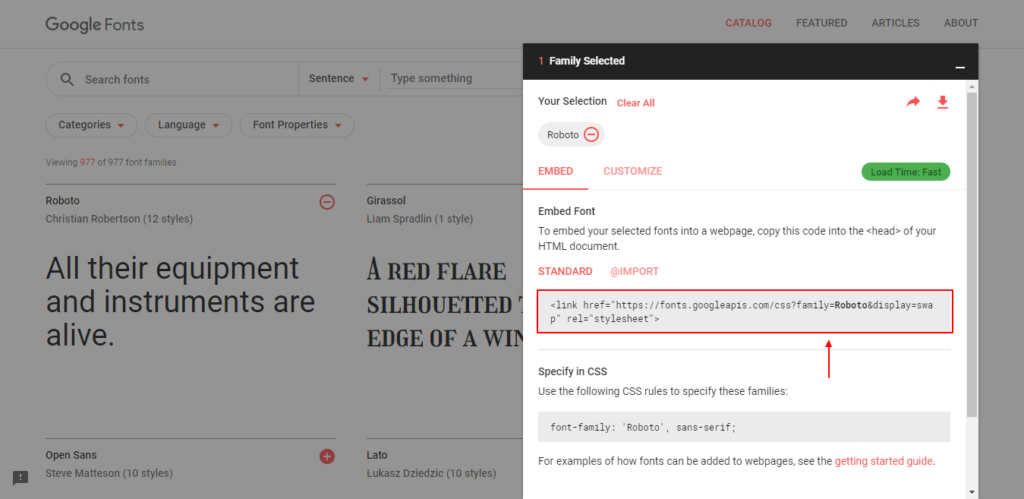
You need to add this above embed code inside the child theme’s header.php after <head> tag.
You can use this font on the child theme CSS file like this:
.h1{
font-family: 'Roboto', sans-serif;
}
Method 2: Directly Using @font-face
It is a direct way. In this method, you need to download the font you like. The font should be in a web format. If you do not have a web format, Convert it here: Webfont Generator. Create a new folder called “fonts” into your child theme and add your new formatted, web-ready fonts inside.
After that, load this new font in child theme’s style.css file like this:
@font-face {
 font-family: New Font;
 src: url(https://www.yourwebsite.com/wp-content/themes//fonts/your-new-font.ttf);
 font-weight: normal;
 }
Replace the font-family and URL with your own.
Finally, You need to configure which elements will use the new font. Add your font using CSS like this:
.h1 site-title {
 font-family: "New Font", Arial, sans-serif;
 }
Method 3: Using a plugin.
It is the easiest method. There are various plugins like Easy Google Fonts, Google Fonts Typography, Custom Fonts, etc.
For example Easy Google Fonts plugin.
First, install and activate this plugin.Go to Appearance > Customize > Typography. You can control the typography of your site there. You can even create your own font control via dashboard settings.
Visit the documentation of the respective plugins for more detailed information.
Method 4: Enqueueing Fonts – The Correct Way.
It is the best way of adding your fonts.
Add the below code into the child theme’s functions.php file( Add code using a Child theme).
function add_google_fonts() {
wp_register_style( 'custom-googlefonts', //fonts.googleapis.com/css?family=Open+Sans|Roboto');
wp_enqueue_style( 'custom-googlefonts' );
}
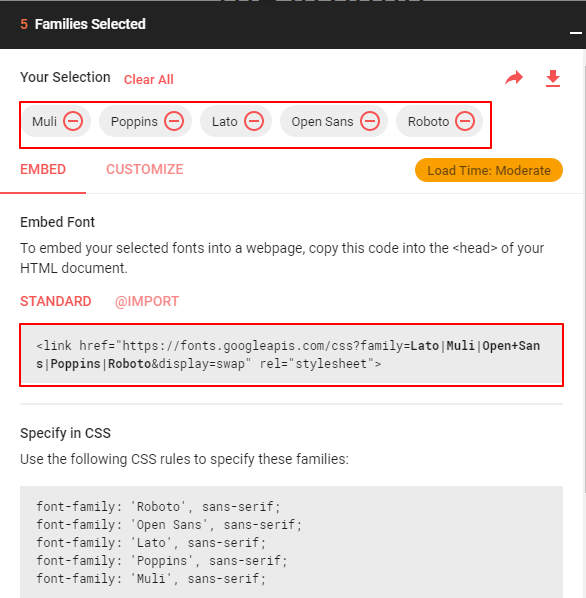
add_action( 'wp_enqueue_scripts', 'add_google_fonts' );You can add multiple fonts in the link above. Visit https://fonts.google.com/ and select the multiple fonts you like. You will see embed code there. You just need to copy the linked part only and paste in the above code. ( starting from //fonts). In the above example, there are two fonts taken: Roboto and Open Sans. Similarly, you can add multiple fonts there.
Use this font using CSS like this:
 .h1 {
 font-family: "Roboto", Arial, sans-serif;
 }
Adding Fonts using Typekit
First, you need to create a Typekit account and create a new kit. You need to select a font from Typekit library and add it to your kit. After that get the embed code for your kit. Now, install and activate Typekit Fonts for WordPress plugin. Paste the embed code on the plugin’s setting page going via Settings > Typekit Fonts.
Use font in CSS like this:
.h1 {
 font-family: "Roboto", Arial, sans-serif;
 }


One thought on “How to Add Custom Fonts in WordPress?”