BlockArt Plugin is a Gutenberg blocks plugin that’ll take your website building to a greater height.
The plugin is made for everyone, whether you’re a beginner or an experienced designer. Moreover, the plugin is pretty simple and easy to use, so anyone can easily get used to it.
With its vast range of tools, you can easily shape your desired site. You get to use their six different blocks and even customize them. Also, you can get started with their pre-built templates and modify the contents.
With that said, let’s fully understand and explore BlockArt in detail!
What is BlockArt? (New WordPress Gutenberg Blocks Plugin)
You must be familiar with Gutenberg, a default WordPress block editor that lets you edit each content block on posts/pages. Though you can add blocks like Paragraph, Button, Heading, etc., to create media-rich content and shape your site’s layout with Gutenberg, it might still not be enough for your site.
That’s where custom Gutenberg WordPress block plugins come in super handy. Among such plugins, BlockArt is also one that comes with all the necessary blocks required for a seamless website building process.
With BlockArt, your site’s speed won’t be compromised as the plugin’s blocks are super lightweight and fully compatible with caching plugins. The plugin works great with WordPress’s latest version and offers regular updates. As of now, the Gutenberg custom blocks plugin has an active installation of 3000+.
Now, let’s explore some of the significant features of BlockArt one by one.
Some Key Features of BlockArt
Advanced Gutenberg Blocks:
The plugin offers the six most useful Blocks to use for your site. You can style each one with different options, and along with it, you can also play around with its setting options. BlockArt lets you shape their advanced blocks as per your liking.
So, all you need to do is add blocks that are most suitable for your design and style it by configuring settings. We’ll be further exploring each Block in detail below!
Pre-made Templates:
You can always choose their blocks and customize them, but you can always get started with their pre-made templates. Professional UI/UX designers have beautifully crafted the ready-to-import templates, sections, and sites, so you will be in awe when you use them.
Also, the plugin lets you easily import any sections/pages from any of the starter packs to your page. Not to forget, you can track the changes you’ve made using its live editing. Also, the plugin will list related templates on the settings while you edit blocks for an easy experience.
Responsive Editing:
Responsive Editing is quite a necessity given the availability of various screen sizes and devices. BlockArt has got you covered in that area with its different tools that come with necessary controls. You can adjust blocks in terms of margin, font size, padding, and more.
It allows you to show/hide blocks on desktops, tablets, mobiles, etc. While editing, you can also preview your content in responsive mode.
Style Any Element:
You can style elements as per your liking and play around with unlimited layout possibilities. Plus, you get full width and contained sectioned container with BlockArt. You can customize and style background colors, images, text colors, etc.
Further, the plugin allows you to style Typographies like letter spacing, text transformation, font-weight, etc. You can even infuse your elements with horizontal and vertical alignment and choose from units that include em, px, em, and %.
Copy and Paste Styles:
With BlockArt, all you need to do to copy block style is click on the button in the block toolbar.
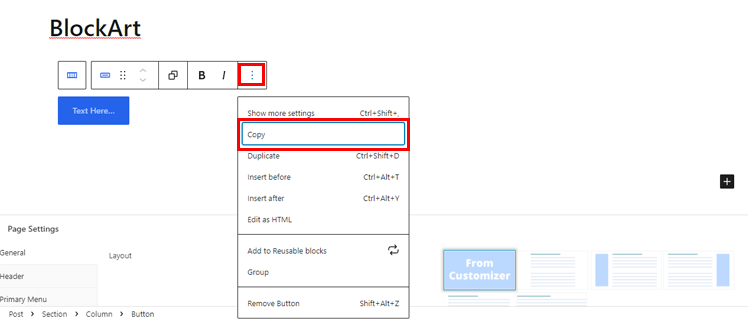
You can copy and paste styles using keyboard shortcuts; Ctrl + C, Ctrl + Alt + V. Also, copying and pasting styles works across any of your browser’s tabs.
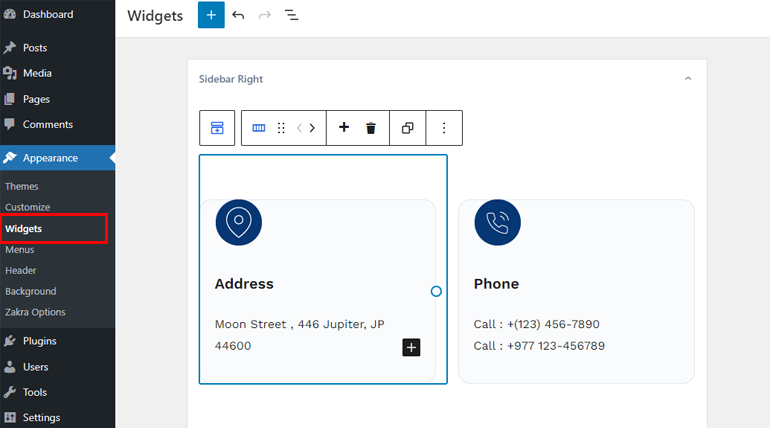
Dashboard widget area and Customizer Widget Editor:
You can add BlockArt blocks to your widget area as well. Further, adding BlockArt blocks on the sidebar is also possible.
Detail Guide on BlockArt’s Blocks
BlockArt offers 6 unique blocks for users. We’ve explained them below:
- Heading: With this block, you can add titles for each section to make your page/post clearer. You can pick from various markups ranging from H1 to H6.
- Paragraph: This block lets you add paragraphs that can be customized and styled in typography, size, etc.
- Section/Column: You can add rows and columns inside sections and create various layouts.
- Image: Images help to make your content more visually attractive and exciting, so use this block for visual communication with your audience.
- Button: You can let your users be redirected to your necessary pages with Button.
- Spacing: With it, you can add space between blocks in your page/post.
Easy Guide on Creating WordPress Page/Post with BlockArt
Now, let’s see how you can use the blocks to create a WordPress page/post.
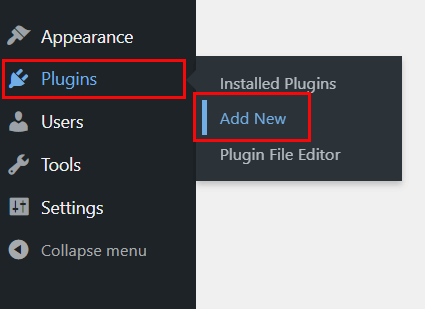
1. Install & Activate BlockArt
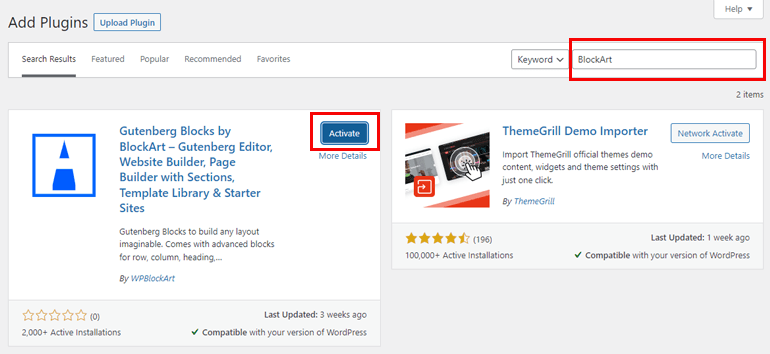
BlockArt is a free plugin that you can install and activate from the dashboard. First, you need to log into your WordPress dashboard and then go to Plugins >> Add New.
Next, search for BlockArt on the search bar and after you see it on the search result, click on the Install and lastly, Activate the plugin.
Note: The plugin comes in-built with a popular multipurpose theme; Zakra. So, if you use the theme, you won’t be required to install BlockArt separately.
2. Use and Getting Started with BlockArt
After you activate the plugin, you need to set it up now. You’ll now be seeing the Welcome to BlockArt message in your dashboard and you can get started by clicking on the Create Your First Page button that’ll next take you to the page editor.
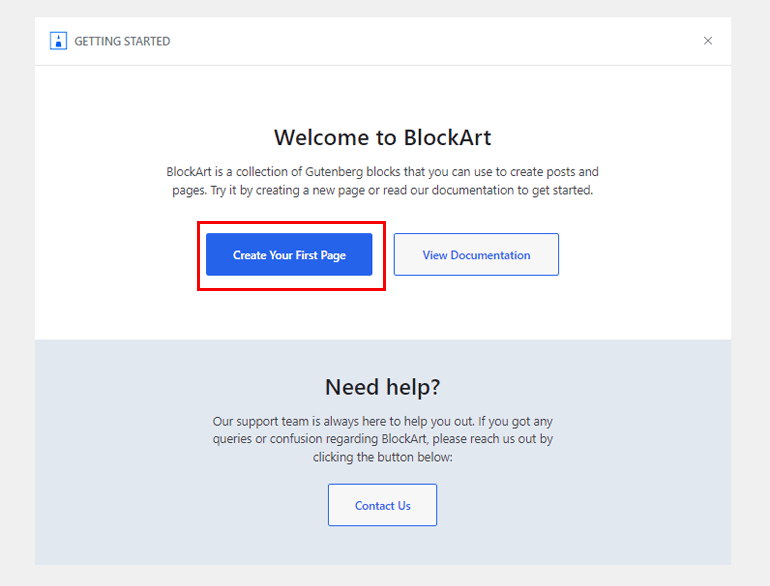
You can also View Documentation to learn more about the plugin. Not to forget, you can also get in touch with a fully experienced support team if you’ve any doubt about the setup process.
3. Create Page/Post Using Blocks
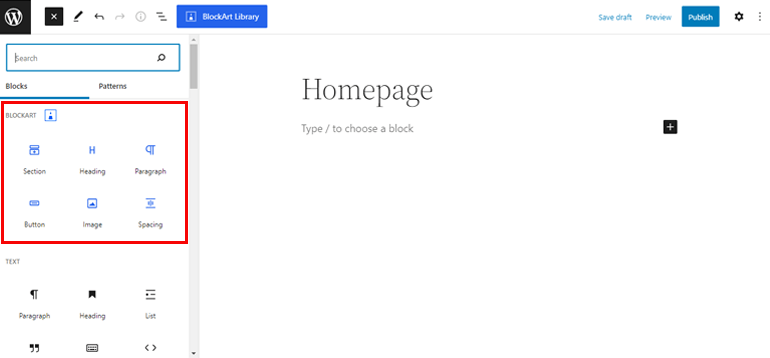
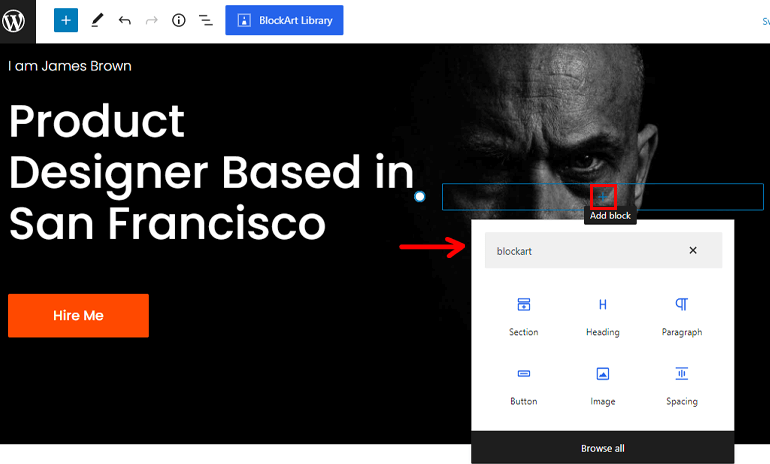
On the page editor, you can add a Title you want. Next, click on the “+” sign at the top left. Here, you can now see all BlockArt’s six blocks that you can use to create a page/post.
For example, choosing the Section block lets you select various layouts and allows you to add up to 4 columns inside one section. You can either add columns inside the section or leave the section as it is.
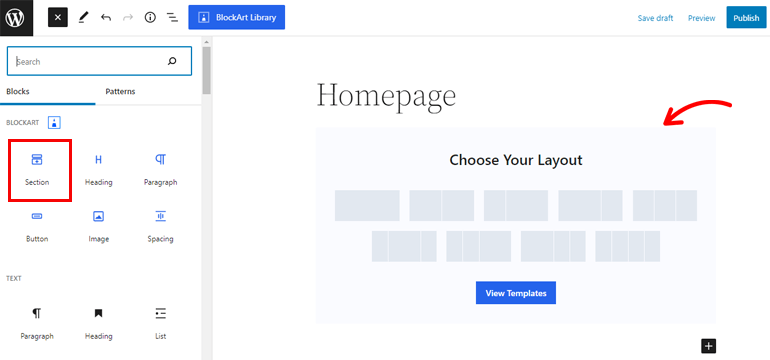
If you choose to add a section, you can also add your other blocks that include Paragraph, Image, Button, Spacing, and Heading to it.
Also, remember that if you wish to add four columns, you can add four blocks.
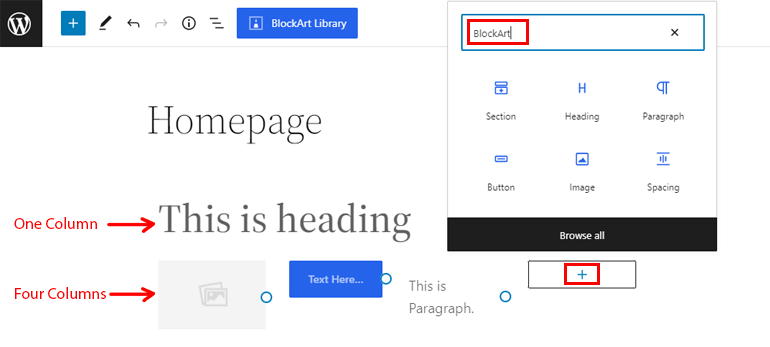
Next, click on the “+” icon to add blocks inside a column. Next, search for BlockArt on the search bar, and you’ll see all the blocks you can use. Click on the block you want to use, and you’re good to go!
4. Configure Block Settings
After you’re done adding blocks, you need to configure block settings.
You can see the settings options on the left sidebar while you select a block. You’ll see different setting options for each block.
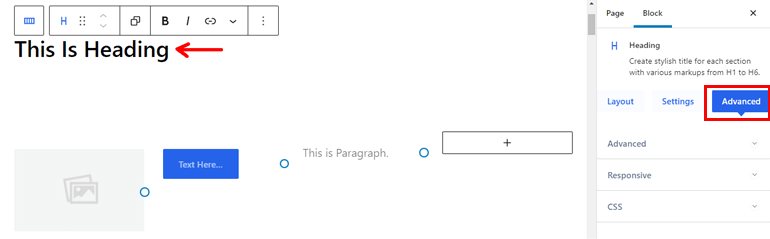
Heading Block
Available Settings:
- General: In this setting, you can choose HTML markup from H1 to H6 and change the size and alignment of your text.
- Text: You can customize the font size, line height, weight, and the advanced typography option.
- Spacing: You can add a margin at the left and right or top and bottom.
- Color: With this setting, you can add color to your text, and it also lets you add a background color.
- Border: Use this option to adjust border-radius and type. Further, it allows you to add border-radius at the top, bottom, left, and right, and you can also enable box-shadow with this setting,
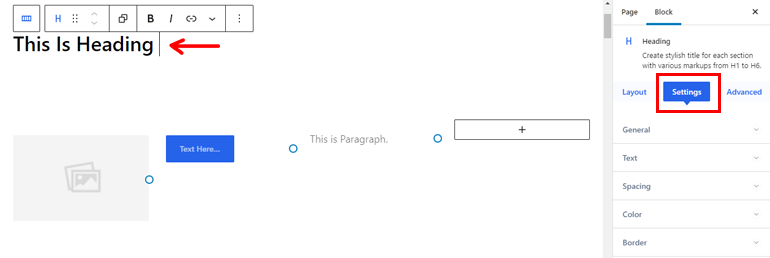
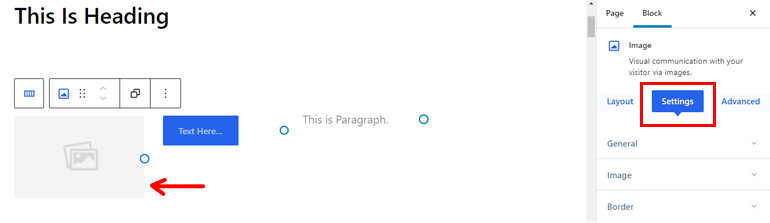
Image Block
Available Settings:
- General: It lets you add URL, Alt Text, and Alignment. Further, you can also add images from your desktop and external sources.
- Image: With it, you can customize the height, width, max-width, opacity, and object-fit of your image.
- Border: This setting lets you add the type and adjust the radius. You can even enable the box-shadow with it.
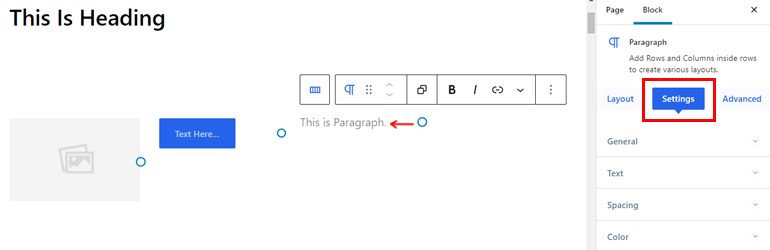
Paragraph Block
Available Settings:
- General: Use it to adjust the alignments of the paragraph.
- Text: You can add the font size, family, line height, and weight and adjust advanced typography.
- Spacing: With it, you can set the margin of the paragraph.
- Color: It lets you add hover color, background color, and image color.
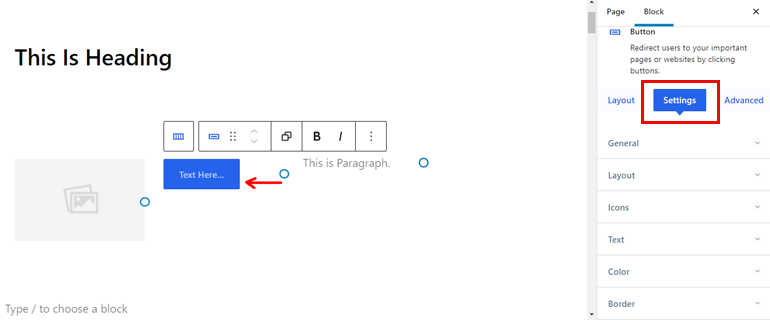
Button Block
Available Settings:
- General: Allows to add the URL link that can enable it to open in a new tab.
- Layout: You can change the size, type, and alignment with it.
- Icons: When you enable this option, you’ll see various icons. You can even customize the size and gap and place icons on the left/right side of the button.
- Text: You can change the font size, family, weight, and line-height along with the advanced typography option.
- Color: Allows to add the color of your liking, background color or image, and hover color.
- Border: With this option, you can enable box-shadow, border type, and radius for your button.
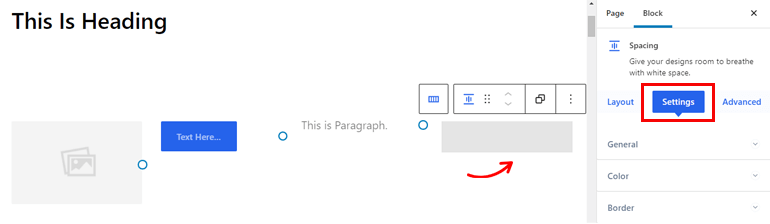
Spacing Block:
Available Settings:
- General: Use it to adjust the height of the block.
- Color: The option lets you add color, background image, and color followed by the hover color of your choice.
- Border: Add the box-shadow option, radius, and hover type.
Advanced Setting
The Advanced Settings is the same for all six blocks, so let’s go through it.
- Advanced: It offers a Z-index option if you want to overlap two blocks. Further, you can add your block margin and padding as you wish.
- Responsive: You get three different options; Hide on Mobile, Tablet, and Desktop. The block won’t be displayed on that device when you enable one of these options.
- Additional CSS Classes: If you’re familiar with coding, it lets you add additional CSS Classes.
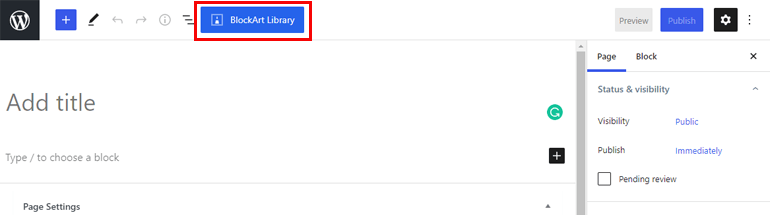
5. Add Pre-built Templates
BlockArt offers unique-looking templates that you can easily import for your page/post.
To do that, go to the Pages menu and hover over to the page you want to add a template to and choose the Edit option.
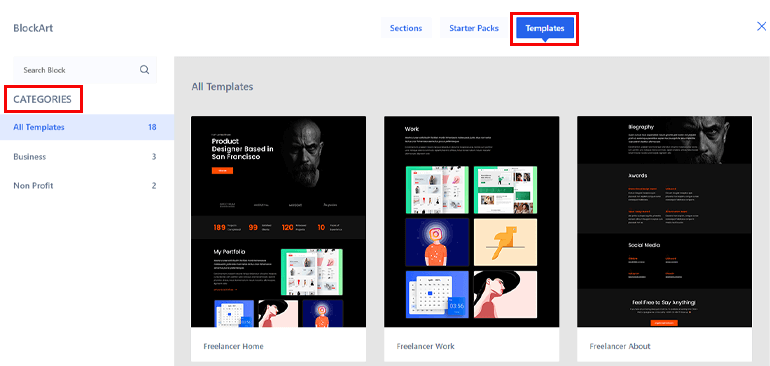
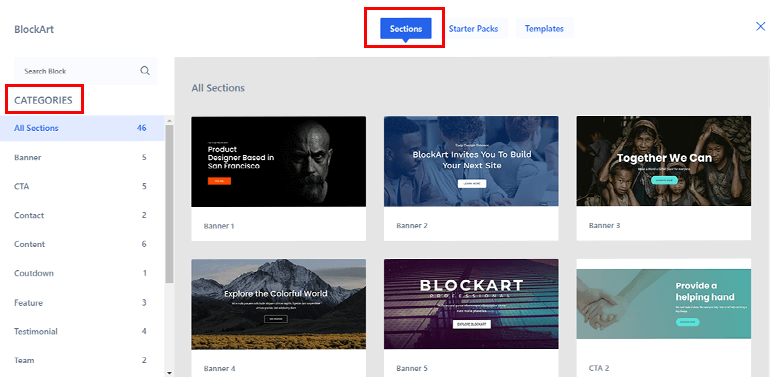
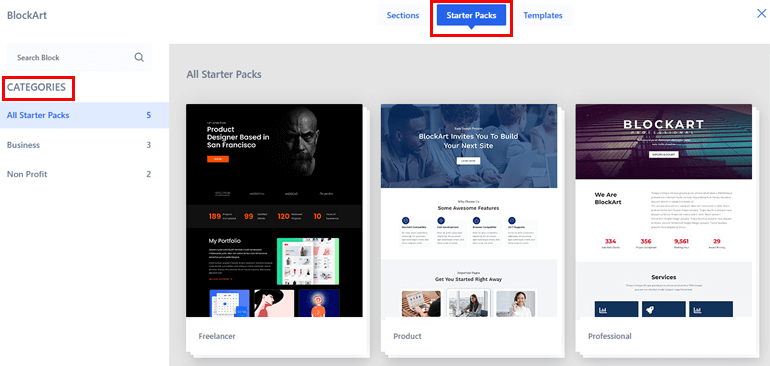
Now, you can see a BlockArt Library button at the top of the page. Click on it, and you’ll see a pop-up that lets you import Templates, Sections, and Starter Packs.
With each template, you can pick from various options like with Templates; you can make excellent pages like About, Landing Page, Contact Page, etc.
As for Sections, you get to set up Banner, CTA, Contact, Countdown, Feature, Testimonial, Team, Service, Project, Pricing, Other, and Gallery.
Now for Starter Packs, you get Categories to choose from that include Business and Non-Profit. It includes templates that can be used to create a site for Product, Freelancer, and more.
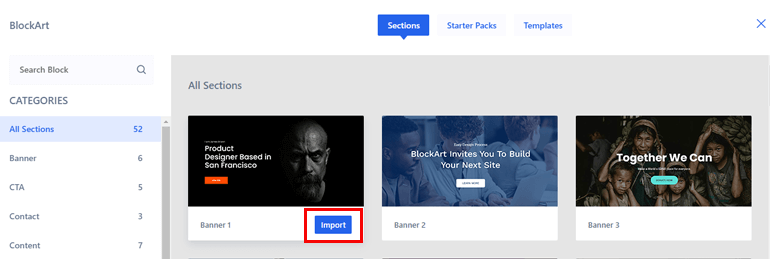
To import these elements, you need to hover around the template you want to use and choose Import options.
Also, you can even add blocks inside the templates by clicking on Add Block option and configuring the settings.
6. Publish Your Page/Post
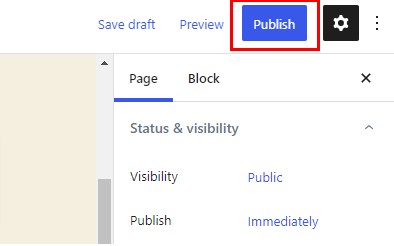
After you’re done adding blocks, all you need to do is publish your page or post.
To do that, click on the Publish button at the top right of your page, and that’s it!
This means that you’ve successfully created a page/post using BlockArt.
Wrapping It Up!
We’ve made it to the end, and we hope that you now know everything you need to know about using BlockArt. It’s a feature-rich Gutenberg blocks plugin that offers plenty of blocks and templates to create your page or post.
Also, if you still have some confusion, don’t forget to go through the Documentation and contact their support team to solve queries.
With that said, install the BlockArt plugin and start setting up your site. If you enjoyed our article, don’t forget to share it on social media and with friends and family.
You can also follow us on Facebook & Twitter to stay updated. Before you go, here’s an interesting article on how to earn money by teaching online courses. Happy Reading!


![Zakra 3.0 | Zakra Pro 2.0 Release [Major Updates!]](https://i.ytimg.com/vi/g3rifl7kWvg/maxresdefault.jpg)