Don’t know how to build WordPress eCommerce website? Don’t worry we got you covered.
We’ll teach you how to create a successful online store from scratch, and turn it into a great business. With our guide, you won’t need a lot of money or excess time, or even technical knowledge to start your own online business. The only thing you should keep in mind is the desire to start your own business.
These days more and more entrepreneurs decide to set up their own online store to sell products online. The reason is the ease and enormous savings of selling your products without a physical location. Also, there are so many platforms to design your store to create an eCommerce store.
Today we’ll be using WordPress to build an online store.
A. Why Choose WordPress to build an eCommerce Website?
WordPress is an ideal platform to set up an online store of clothing, shoes, jewelry, electronic products, furniture, etc. You can sell both physical products and downloadable, virtual, affiliate products, etc. And, above all, creating an online store in WordPress is free.
As you already know if you have read our other articles, WordPress is a tool that works with plugins, and most of them are free. WordPress is compatible and works with major eCommerce plugins, which allow you to set up a free online store and sell products online.
If you have never worked with WordPress themes, we recommend that you read this guide to What is WordPress Theme first, where we explain step by step all the essential functions so that you get the most out of the tool.
B. How to Build WordPress eCommerce Website? (Step by Step)
Step 1. Name your Business
To boost your business, you need to solidify a brand for your website. Having the “right name” could be making the difference between a platform that attracts buyers.
Keep these little tips in mind when trying to choose your business name:
- It should stay in people’s minds.
- It should be short and simple.
- It must be different and original.
- Through the name you choose, you must make clear the product you will sell.
If you’re having a hard time choosing a suitable name for your blog then there are blog name generators that you can check out. Once you’ve chosen the name of your company, you must buy the domain.
Step 2. Register Domain Name
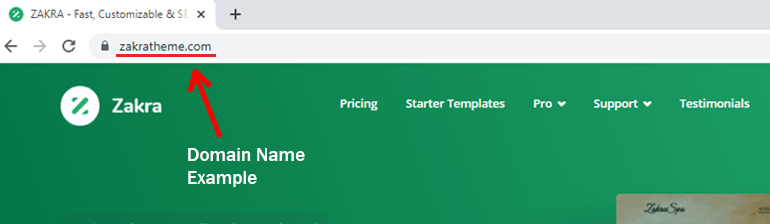
The second step to build WordPress eCommerce website is to register a domain name. In a very simple term domain name is the address of your website which people type in the browser bar to visit your website. When you visit google or youtube, you can see URLs google.com and youtube.com. Similarly, zakratheme.com is our website’s domain name.
There are tons of domain name registrars that allow you to register a domain name for your business.
Today in this tutorial we’ll be using GoDaddy to show you how to register a domain name.
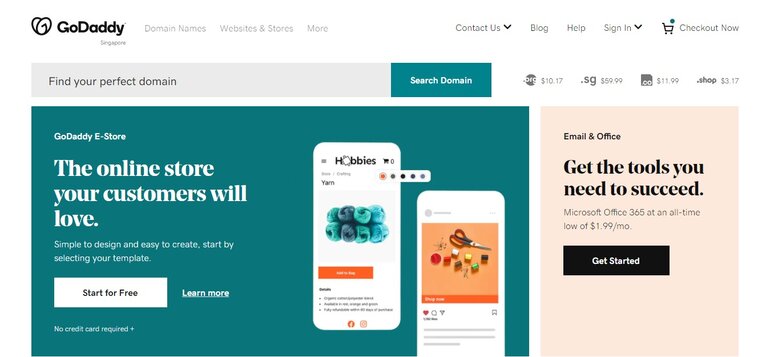
You’ve already chosen a name for your business. Now, check whether the domain name is available or not. Every domain name registrar has a feature of a search tool as soon as you visit their website.
After entering the name, you’ll see if the domain is available or not.
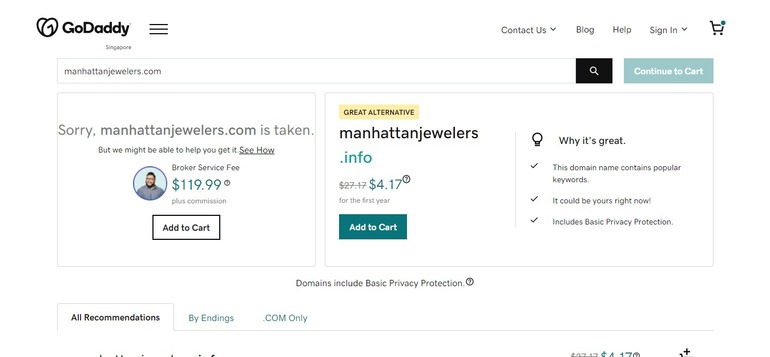
If you see that the name you want is already registered, you’ll be recommended a list of the same domain name with other top-level domain (TLD) options, such as .BIZ, .ME or .SHOP along with the pricing.
Once you’re happy with the domain name and if it available you can just click on “Add to Cart” button.
Once you’re done, you can just click on the ‘Continue to Cart’ button on the top right.

Now, you can various include add-ons (domain privacy protection, custom email address, hosting services) which might be needed for you. You can select or deselect those options according to your preferences. And once you’re done again click on the “Continue to Cart” button.
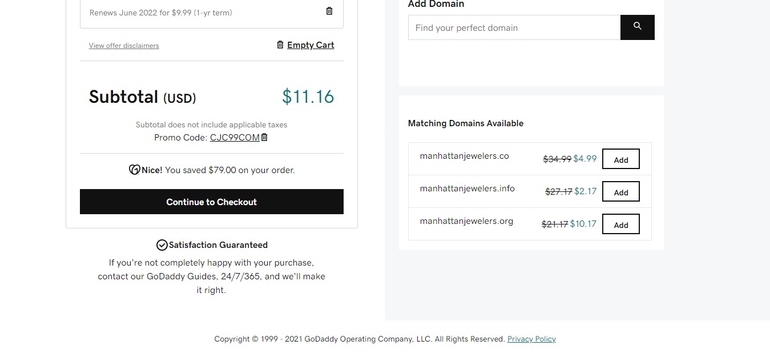
After that is done, you’ll be redirected to the checkout page. You can see your purchased items and subtotal. Once you’re happy with it, click on the ‘Continue to checkout’ button. You can then create a GoDaddy account for billing and payment.
With that, we’ve successfully registered a domain name for our eCommerce website.
Step 3. Choose a Hosting Provider
This is practically the mandatory investment that you have to make to have your e-commerce. Look for a company that offers you quality hosting and guarantees of fast loading, something essential so that the user experience and search engine optimization are good.
Also make sure that your hosting guarantees you enough space for your online store to avoid server outages so that your online business is available 24 hours.
You can choose from hundreds of different web hosting providers. In this tutorial, we’ll show you how you can get started with Siteground for an eCommerce website.
We choose SiteGround because it consists of a hosting plan specially for eCommerce website.
First of all go to the SiteGround’s official page and select WooCommerce Hosting.
After that, the WooCommerce hosting pricing plan will appear on your screen.
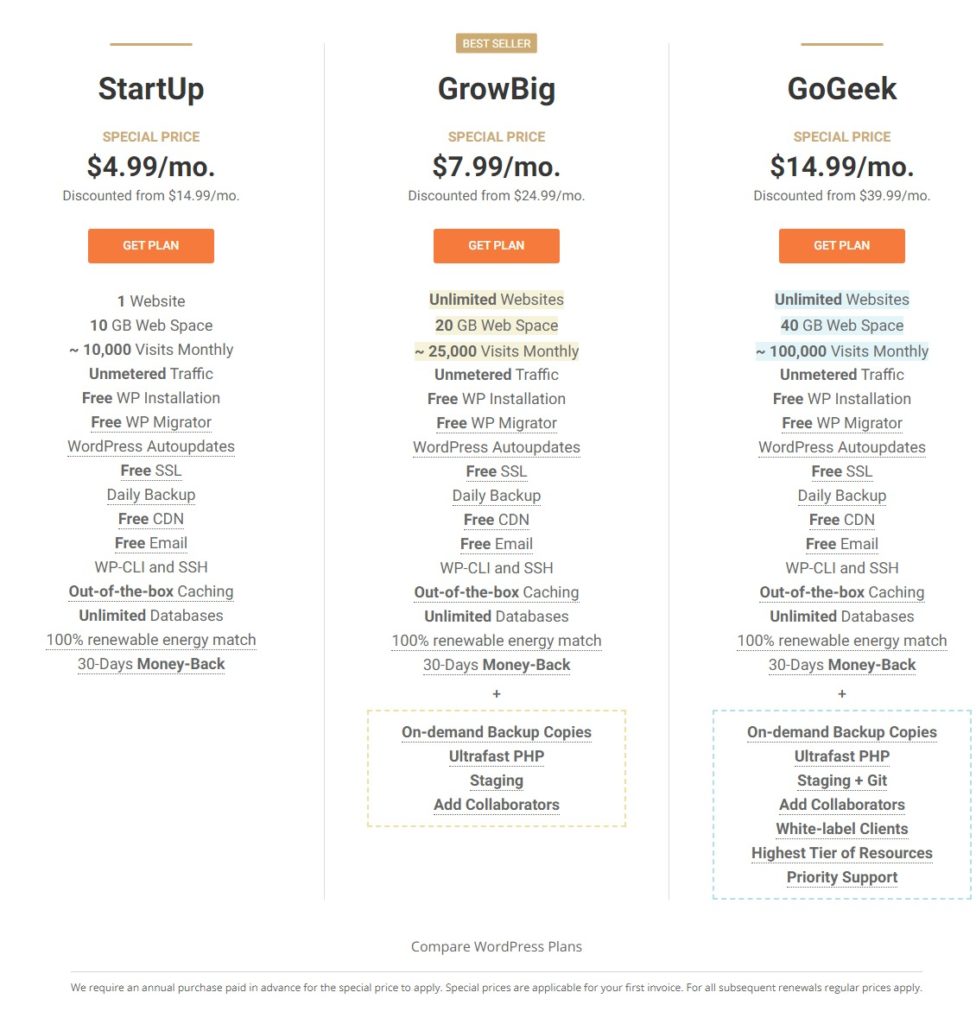
There you’ll see three different hosting plans available: StartUp, GrowBig, and Grow Geek. Check the features that are included in the pricing plans and select the package according to your needs.
And click on ‘Get the Plan‘ button.
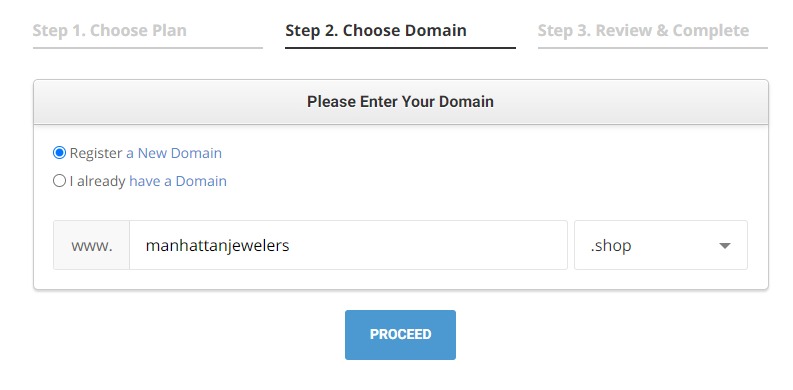
Now, you’ll reach a page where you need to set up your domain name. You can either register a new domain name or fill in with the name which you have already registered. There is an extra fee to register a domain name if you don’t have a domain name and have to register one.
Enter the domain name that you’ve chosen and click on ‘Proceed’.
Again, you’ll be directed to the next page where you need to enter your personal details. Enter every detail carefully and scroll down your page.
You can find sections like personal information, payment information, purchase information where you can pay an upfront amount for up to 36 months. You can also find different services like Domain Privacy and SG Site Scanner.
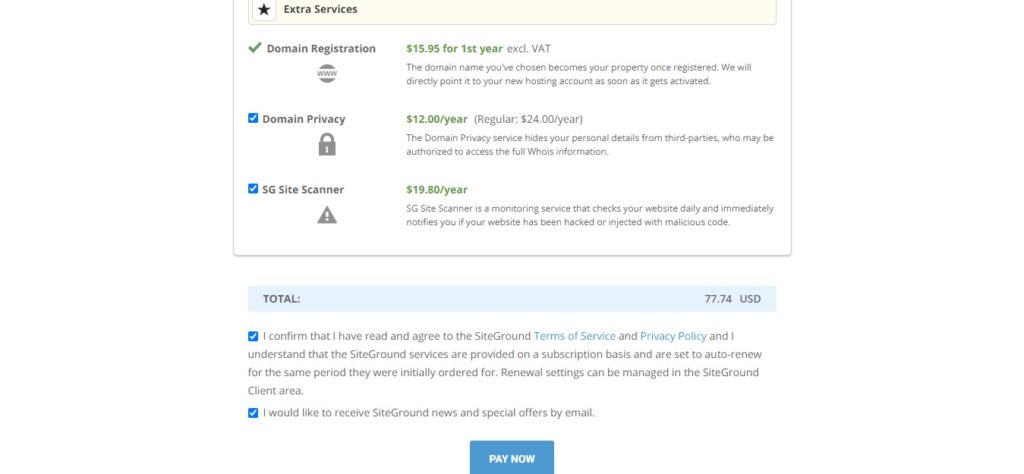
Finally you can read their terms and conditions and make the payment.
After this, you’ll receive an email that contains details about logging into your hosting control panel. Simply follow the steps and log in to the cPanel.
Alternatively, you can choose Bluehost as the hosting provider.
Step 4. Install and Configure eCommerce Plugin
There are a few popular plugins to build WordPress eCommerce website. Here we’ll be using the WooCommerce plugin which is free and adds the functionalities of an online store to your WordPress site. Here are the reasons why you should choose the WooCommerce plugin:
- It is very powerful and scalable.
- Secured and 100% compatible with secure HTTPS (SSL) protocols.
- It is compatible with practically all known gateways and payment methods.
- It does not require programming knowledge.
- You have a huge community of users and support, both free via forums and professional via companies that offer their services.
There are hosting providers which install WordPress and WooCommerce automatically depending on the plans. If the plan doesn’t have such an option you can download the plugin manually.
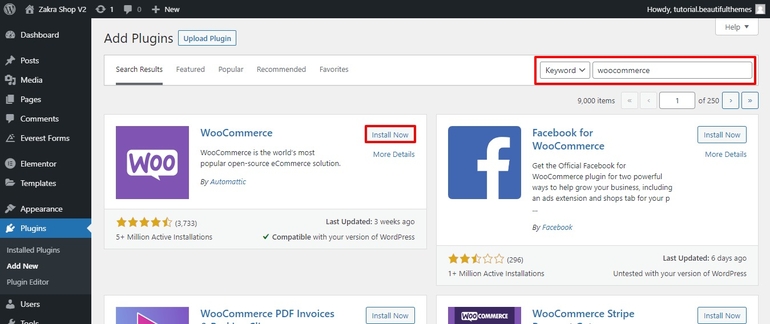
In your WordPress Dashboard, go to Plugins> Add New, and in the search bar type WooCommerce. Next, click Install Now and Activate the plugin.
After Installation and activation, we need to set up and configure WooCommerce.
i) Setup WooCommerce
After installing WooCommerce, you’ll be prompted to walk through a setup wizard. In case it didn’t happen, find ‘WooCommerce’ on the left side of your WordPress dashboard and click on it.
Go to the settings to add the details and business information.

In the general section of settings, you can add details like address, selling locations, and currency options. Don’t forget to Save Changes which is at the bottom.
Keep in mind that you can change the details anytime through WooCommerce settings if necessary.
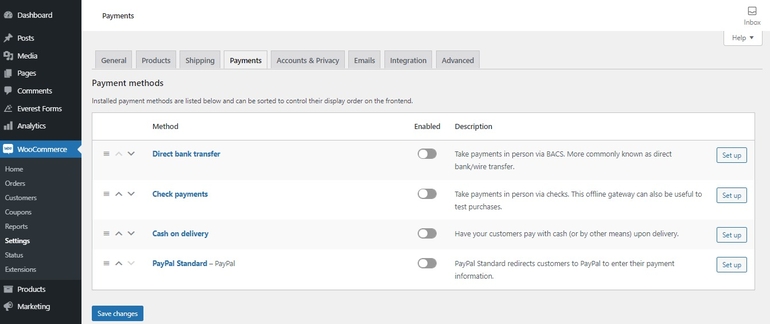
ii) Choose Your Payment Processors
On the next page, you can decide what payments you’ll enable for your online store.
Step 5. Install WordPress eCommerce Theme
Even if you decide to create a DIY website, you don’t need to start with a blank board. You can start your site design with free themes and templates. There is a great variety of themes and templates adjustable to your needs, which are available on the WordPress repository.
But while choosing a theme make sure that the theme is compatible with the WooCommerce plugin along with looking professional and attractive in design.
Today, we would like to use the Zakra Shop template which is responsive and fully customizable. Let’s take a look at how to install an eCommerce theme on your WordPress.

First of all, login to your WordPress admin account. Click on the ‘Appearance‘ option and then on ‘Themes‘.
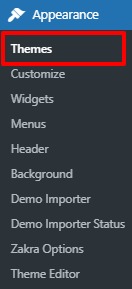
After that, you’ll be redirected to the themes page. On the top of the screen, you can see the ‘Add New’ button. Click on it.
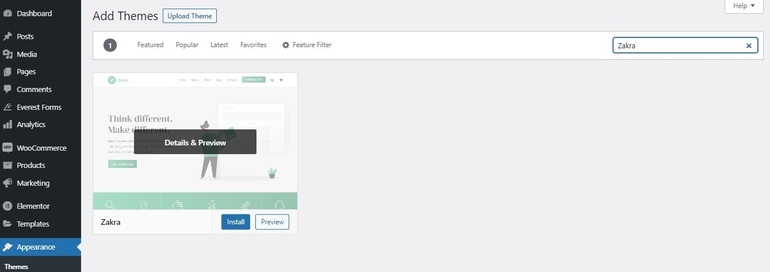
Search for Zakra Theme in search bar. Then, install and activate the theme.
In this way, you can install the Zakra Theme to build WordPress eCommerce website. For a detailed tutorial, check our beginner guide on how to install a WordPress theme.
How to Import Online Store Demo for Your eCommerce Website?
As you can see Zakra has various starter demos. Now, we need a template that perfectly fits the online store. For that we need to import the online store demo.
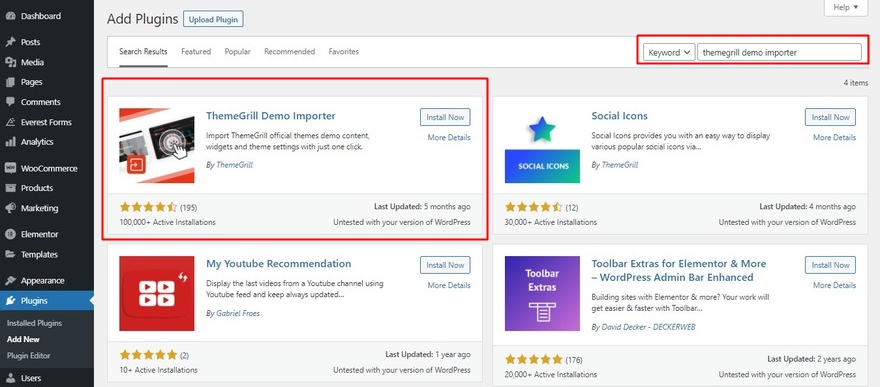
To do so, we’ll need a help of a plugin ThemeGrill Demo Importer. To install the plugin, go to your WordPress dashboard. Go to the Plugins sections and click on the ‘Add New‘ button.

Search for “ThemeGrill Demo Importer” in the search bar. As you can see on the displayed results select the plugin and click on “Install Now” and don’t forget to “Activate” the plugin after installation.
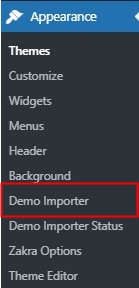
After that, you’ll have to go to the demo importer page where you’ll find different demos of the Zakra theme all ready to use. In your WordPress dashboard, you can see the “Demo Importer” option in the Appearance section.
By clicking the “Demo Importer” you’ll be redirected to the page where you can all of the demos. Now, we need a particular theme for online store, we can either click on the ecommerce category or just scroll down to look for the demo.
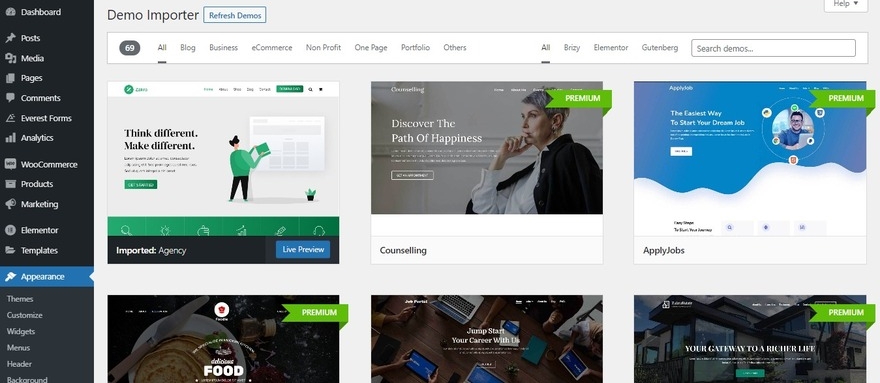
Once you’ve found the demo, just click on the “Import” button. Click on the ‘Preview’ option if you want to preview the demo else click on ‘Import’ and ‘Confirm’.

That’s how you’ll easily import the demos. Now you may start to add products to your online store.
Step 6. Add Products to Your WordPress eCommerce Site
Now find ‘Product’ on the left side of your WordPress Dashboard and click on it. This will direct you to all the products which you’ve currently.
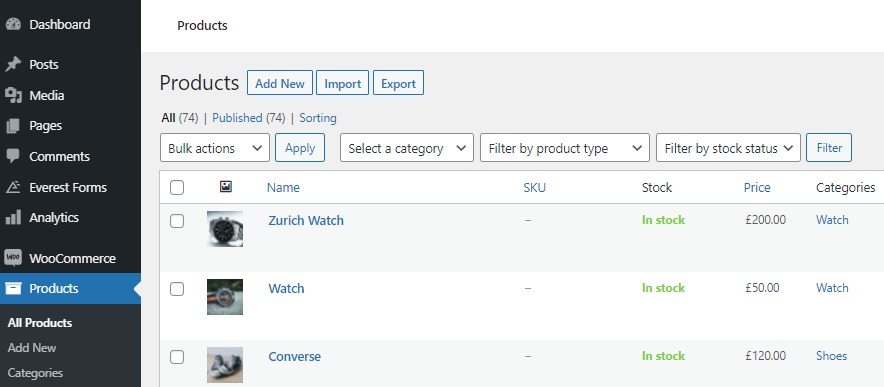
You can add products by adding new products or importing them from other store.
Import Product via CSV
WooCommerce has a built-in product CSV importer and exporter. This method allows you to import all product through a CSV file.
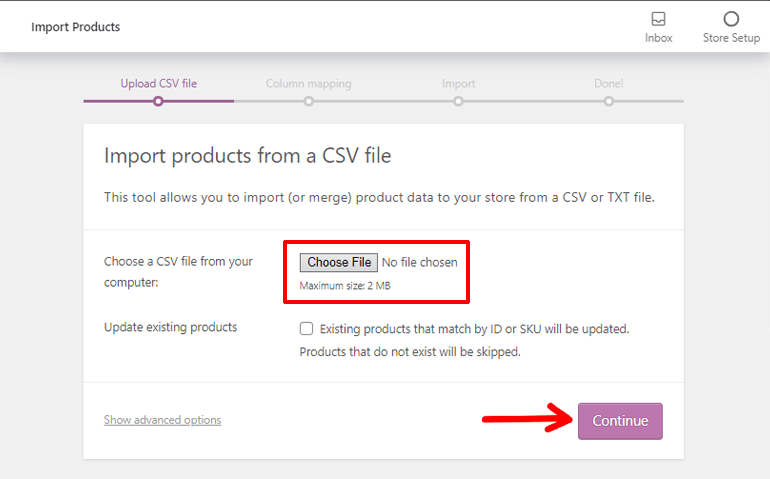
To import products you’ve to click on the ‘Import via CSV’ and you’ll reach a new page. All you need to do is click on the ‘Choose File’ to select a CSV file (Max 2 MB) from your computer. After that, click on ‘Continue’.
After that the Column Mapping screen will be display and WooCommerce will automatically attempt to match the Column Name from your CSV to Fields.
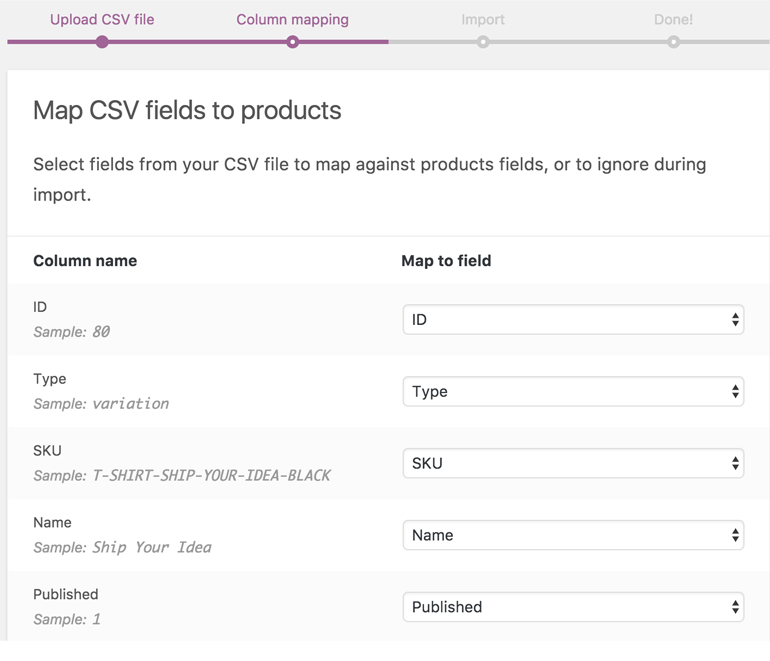
You can adjust fields or indicate ‘Do not import’ from the dropdown menus on the right side. If any column gets unrecognized, it’ll not be imported by default. Again, select the ‘Run the Importer’ button.
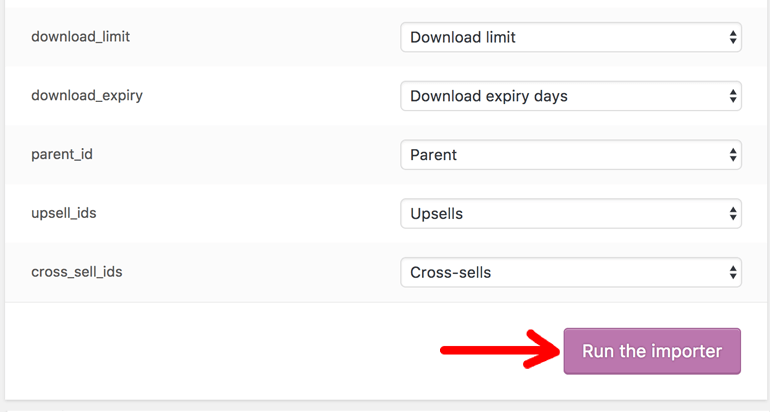
Now your products are imported. While the products are being imported, do not refresh or click somewhere else.
Step 7. Install Additional Plugins and Extensions
Now, you’ve successfully built a WordPress eCommerce website and you can start selling your products. However, you can grow your online store by adding extra functionality with plugins and extensions.
There are plenty of plugins and extensions that you can integrate with your eCommerce website. Let’s recommend you some of the plugins and extensions for your eCommerce store
Contact forms are very important so that consumers can make their questions or comments. Everest Forms is the most beginner-friendly with which you can create orders, payments, subscription forms by email.
Everest Forms has an interface that stands out for its ease of configuration (ideal for beginners). People who want more advanced features can go for its Pro version, which has more options and customization features.
ii) OptinMonster
This is a very popular conversion rate optimization software. It helps to convert visitors into subscribers, through the request of their mail. Another of its functionalities is to create an email subscription list and increase the reach of loyal customers.
iii) Yoast SEO

Yoast SEO optimize a website for search engines and improves the visibility of your website for key audiences. Some of the functions it includes are adding meta tags or helping in the SEO ranking of your website.
iv) LiveChat
LiveChat is a chat support software, something that cannot be missing in our eCommerce to serve our customers when they’ve doubts. The plugin is customizable and comes with a mobile app so you can quickly respond to all the people who interact via Live Chat.

Safety must be a priority for any website. This plugin takes care of protecting your eCommerce website while monitoring and protecting your site from DDoS, malware threats, XSS attacks, brute force attacks, and any other type of attack.
Check out this article if you want to learn about more security plugins – the best WordPress security plugins.
Wrapping Up:
That’s it, you can build WordPress eCommerce website and start your online store with these steps mentioned in this eCommerce tutorial.
We hope that this step-by-step guide was helpful to you and you can create your eCommerce website using WooCommerce without many resources.
If you’re planning to start a blog then you can check our tutorial on How to Start a WordPress Blog.
Hope you like the article that we presented today. If yes then do support us by sharing this article in your social channels.


![Zakra 3.0 | Zakra Pro 2.0 Release [Major Updates!]](https://i.ytimg.com/vi/g3rifl7kWvg/maxresdefault.jpg)